
Автор статьи
Глеб Антоненко


In this article we will talk in detail about creating and setting up CRM forms in Bitrix24, as well as ways to connect them to your website.
Options for placing CRM forms
- In a separate window
- Pop-up form after clicking a button or external link
- Popup form in dialog box
- Widget with other online services (Telegram, Viber, Online chat)
Setting up CRM forms
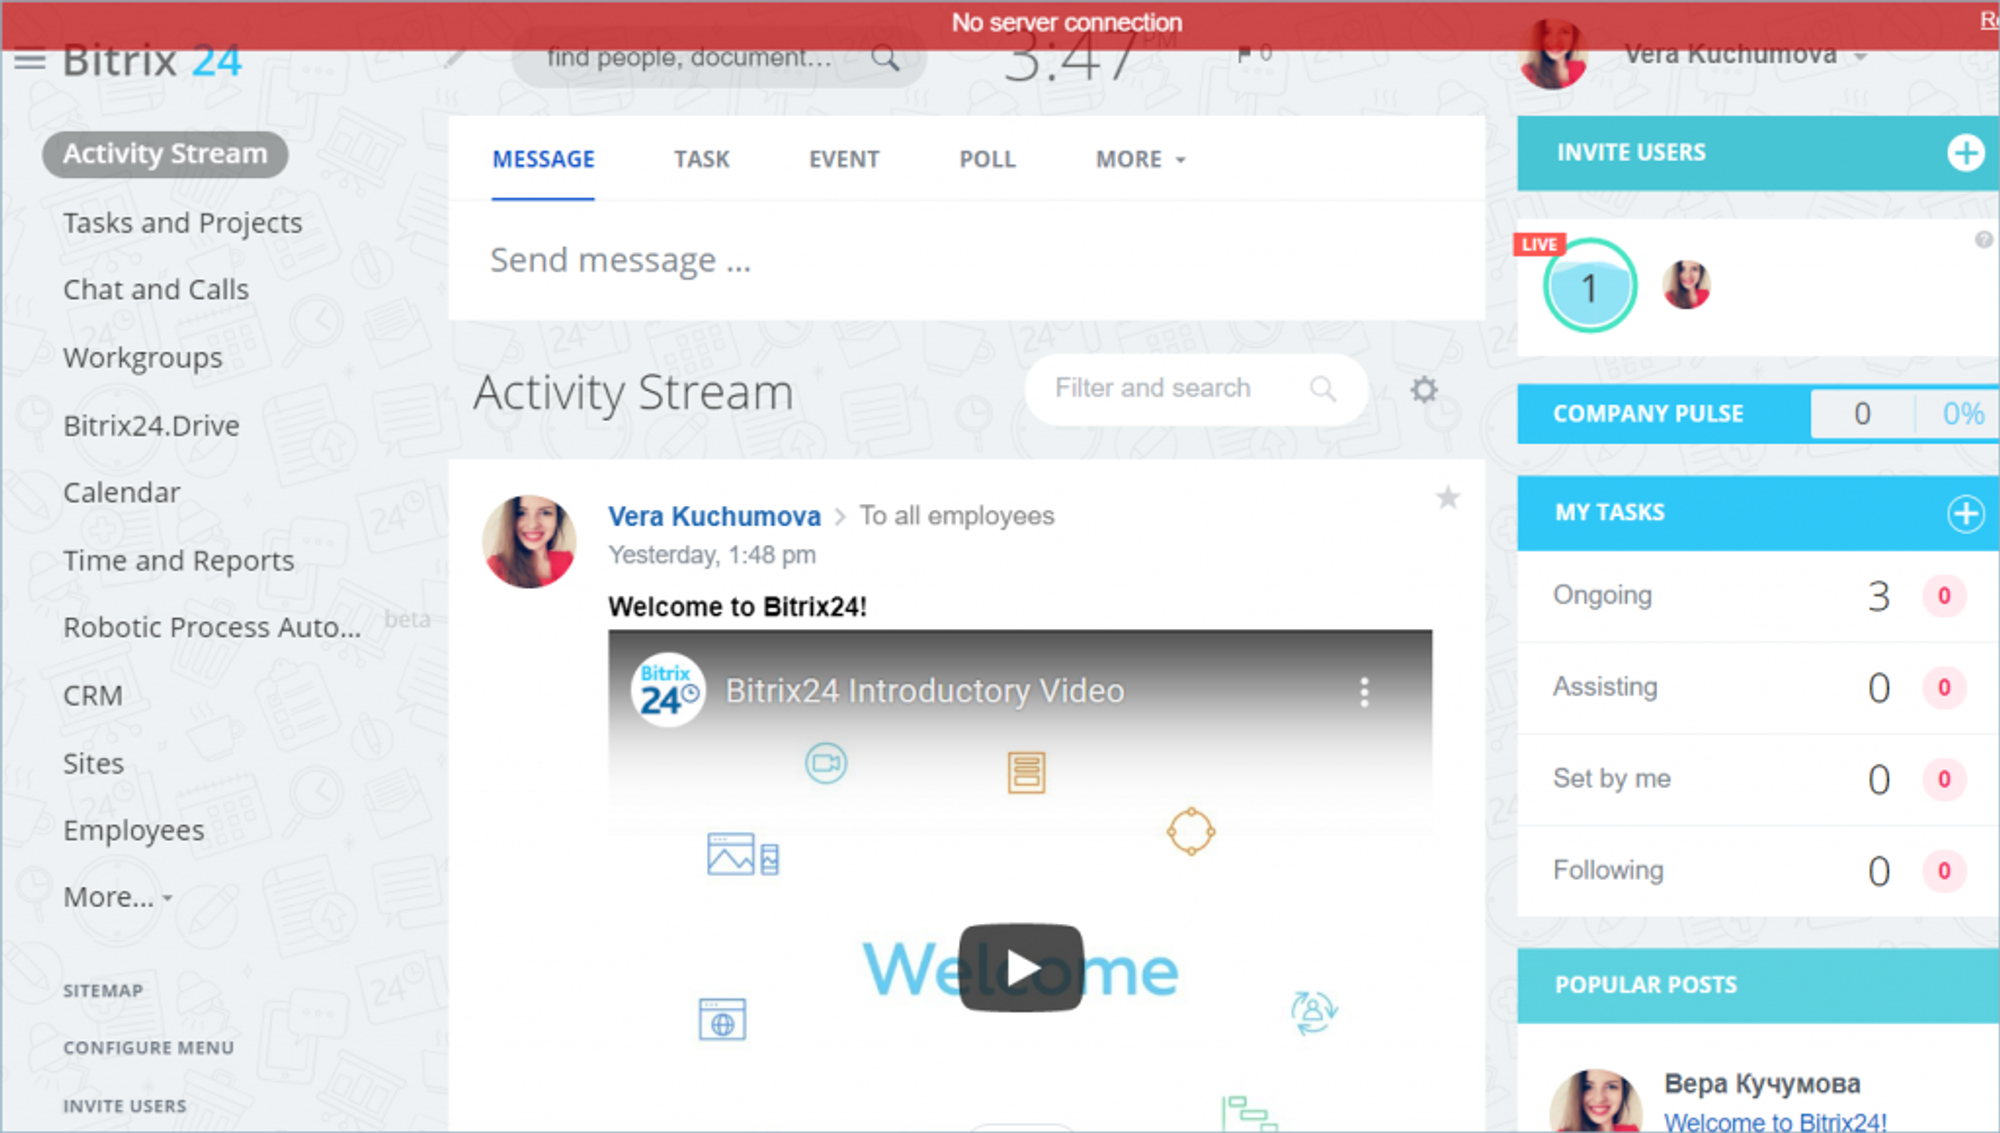
Work with forms is carried out on the “CRM Forms” tab.
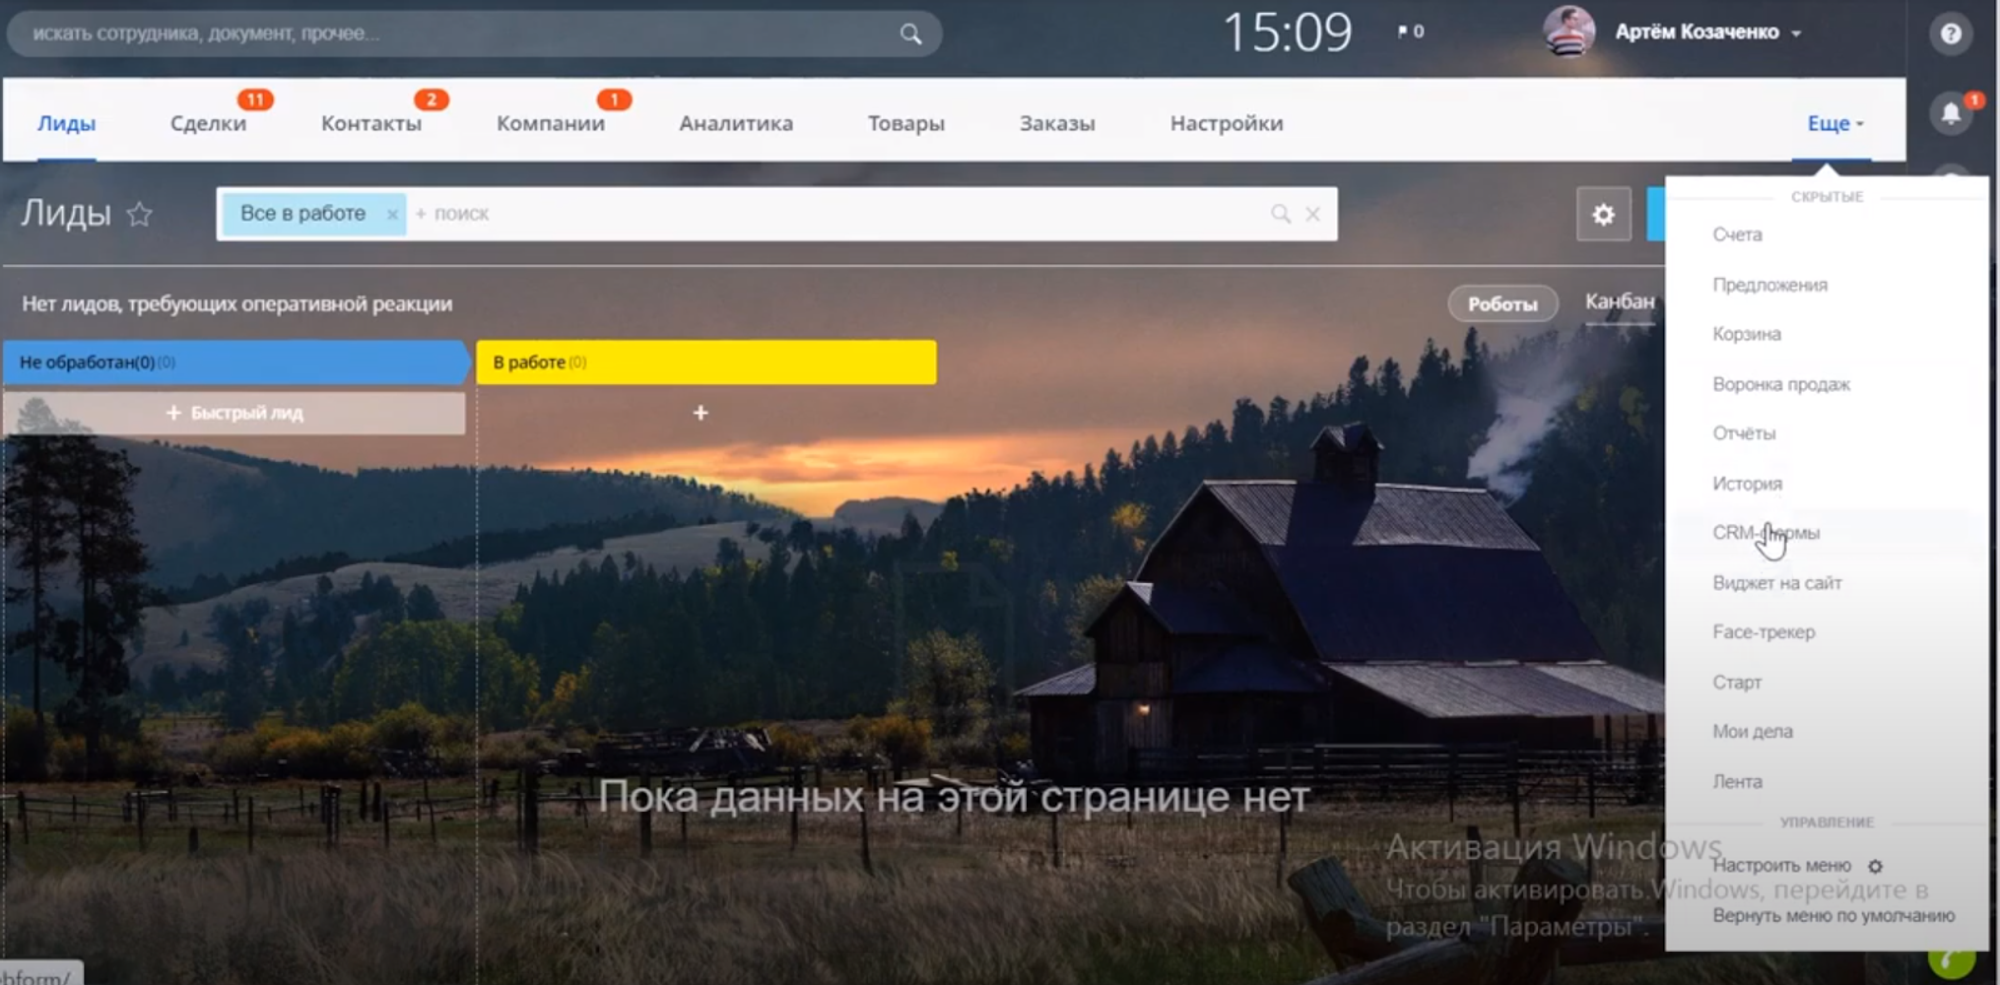
In the window that appears, you need to click the “Create Form” button, after which a dialog box with settings will appear.
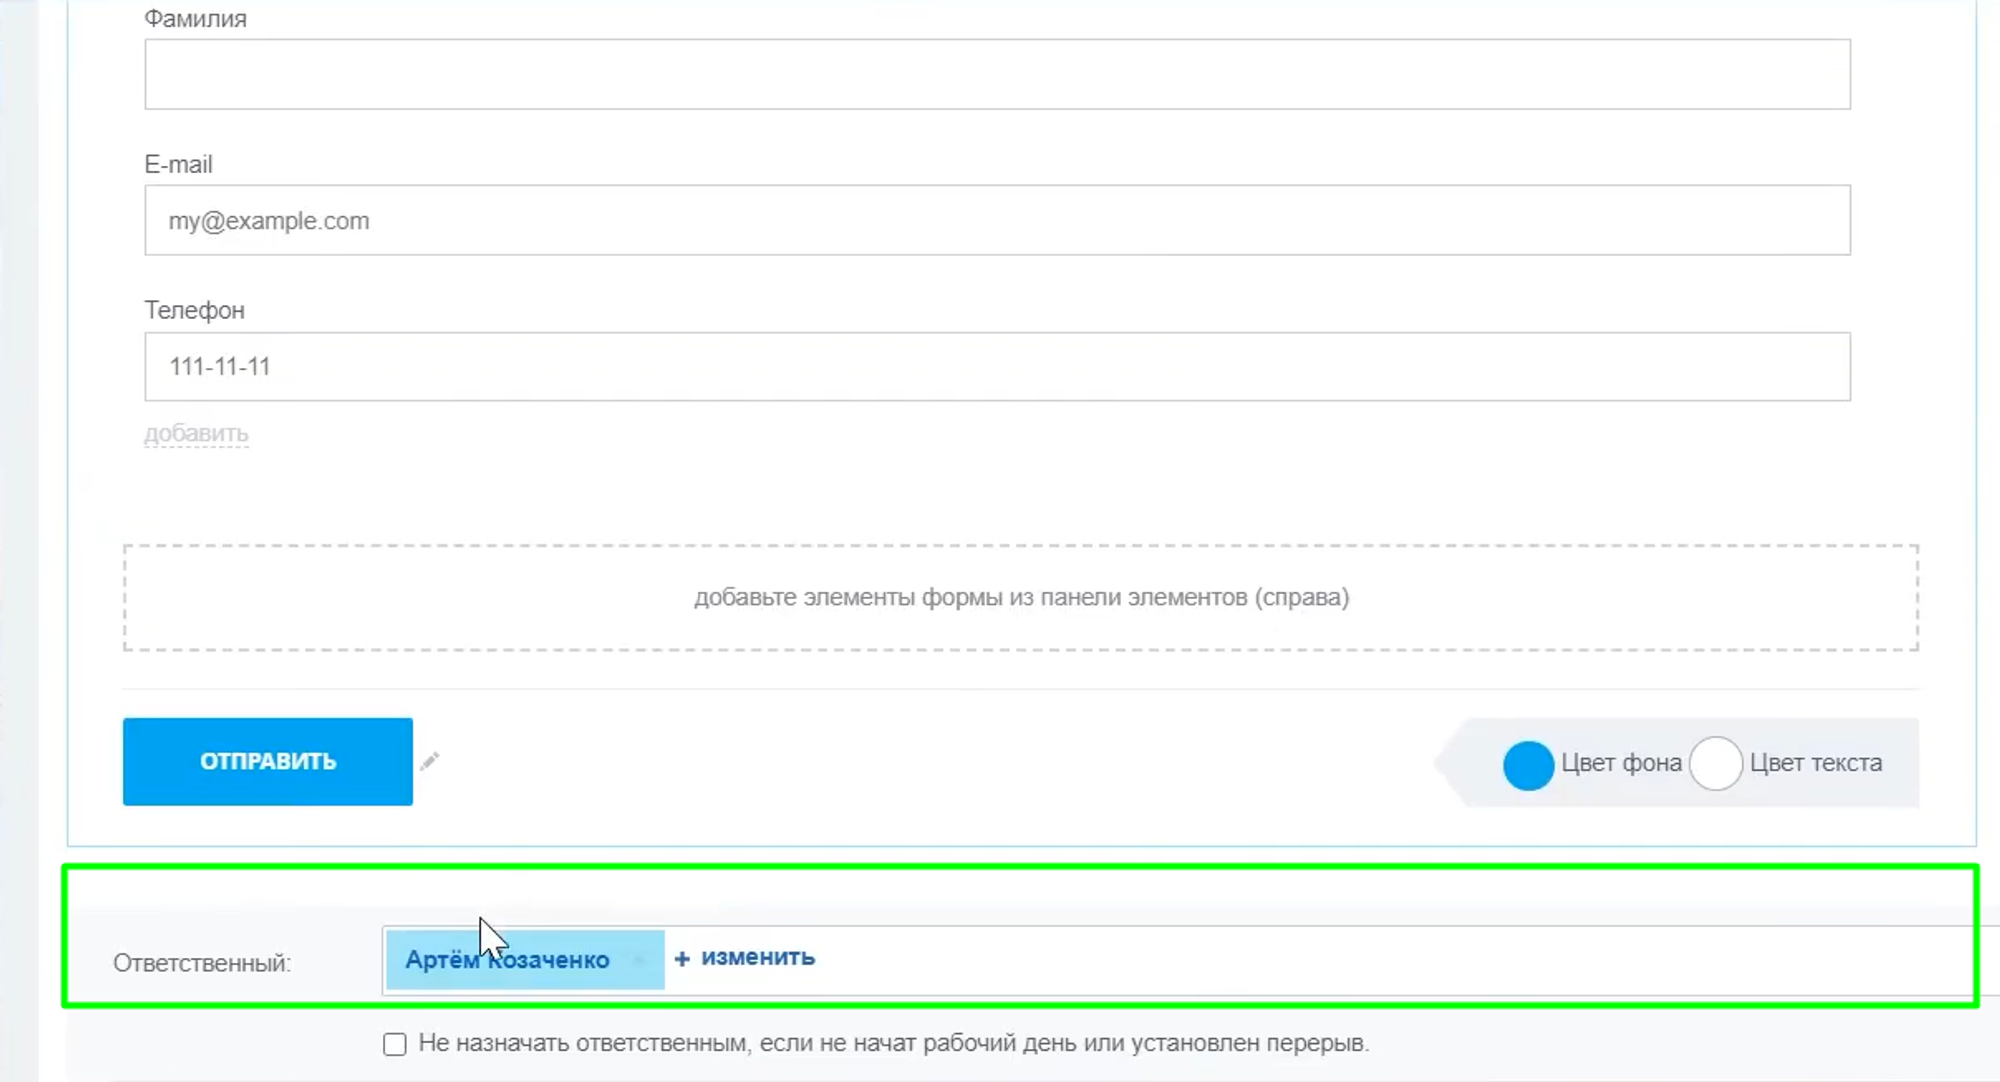
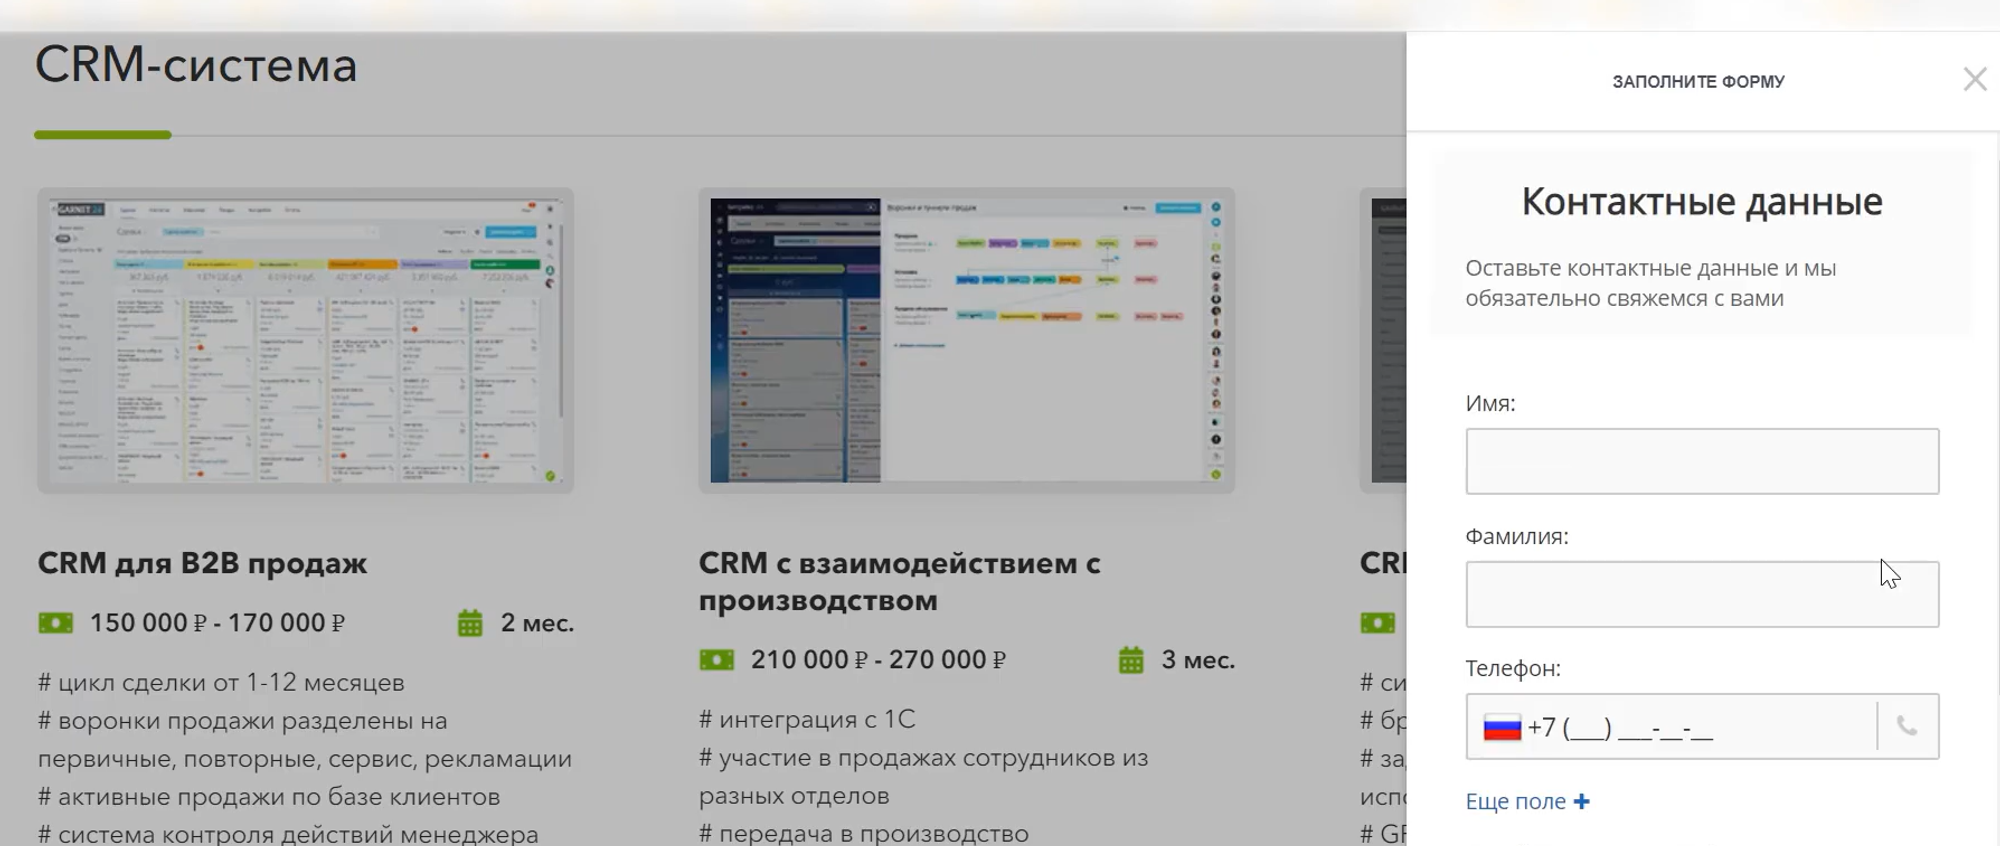
You need to fill in the following information:
- Form title
- Detailed description
- Fields to add to the form

Each of the added fields has its own settings.
For example, the phone number field can be made multiple.
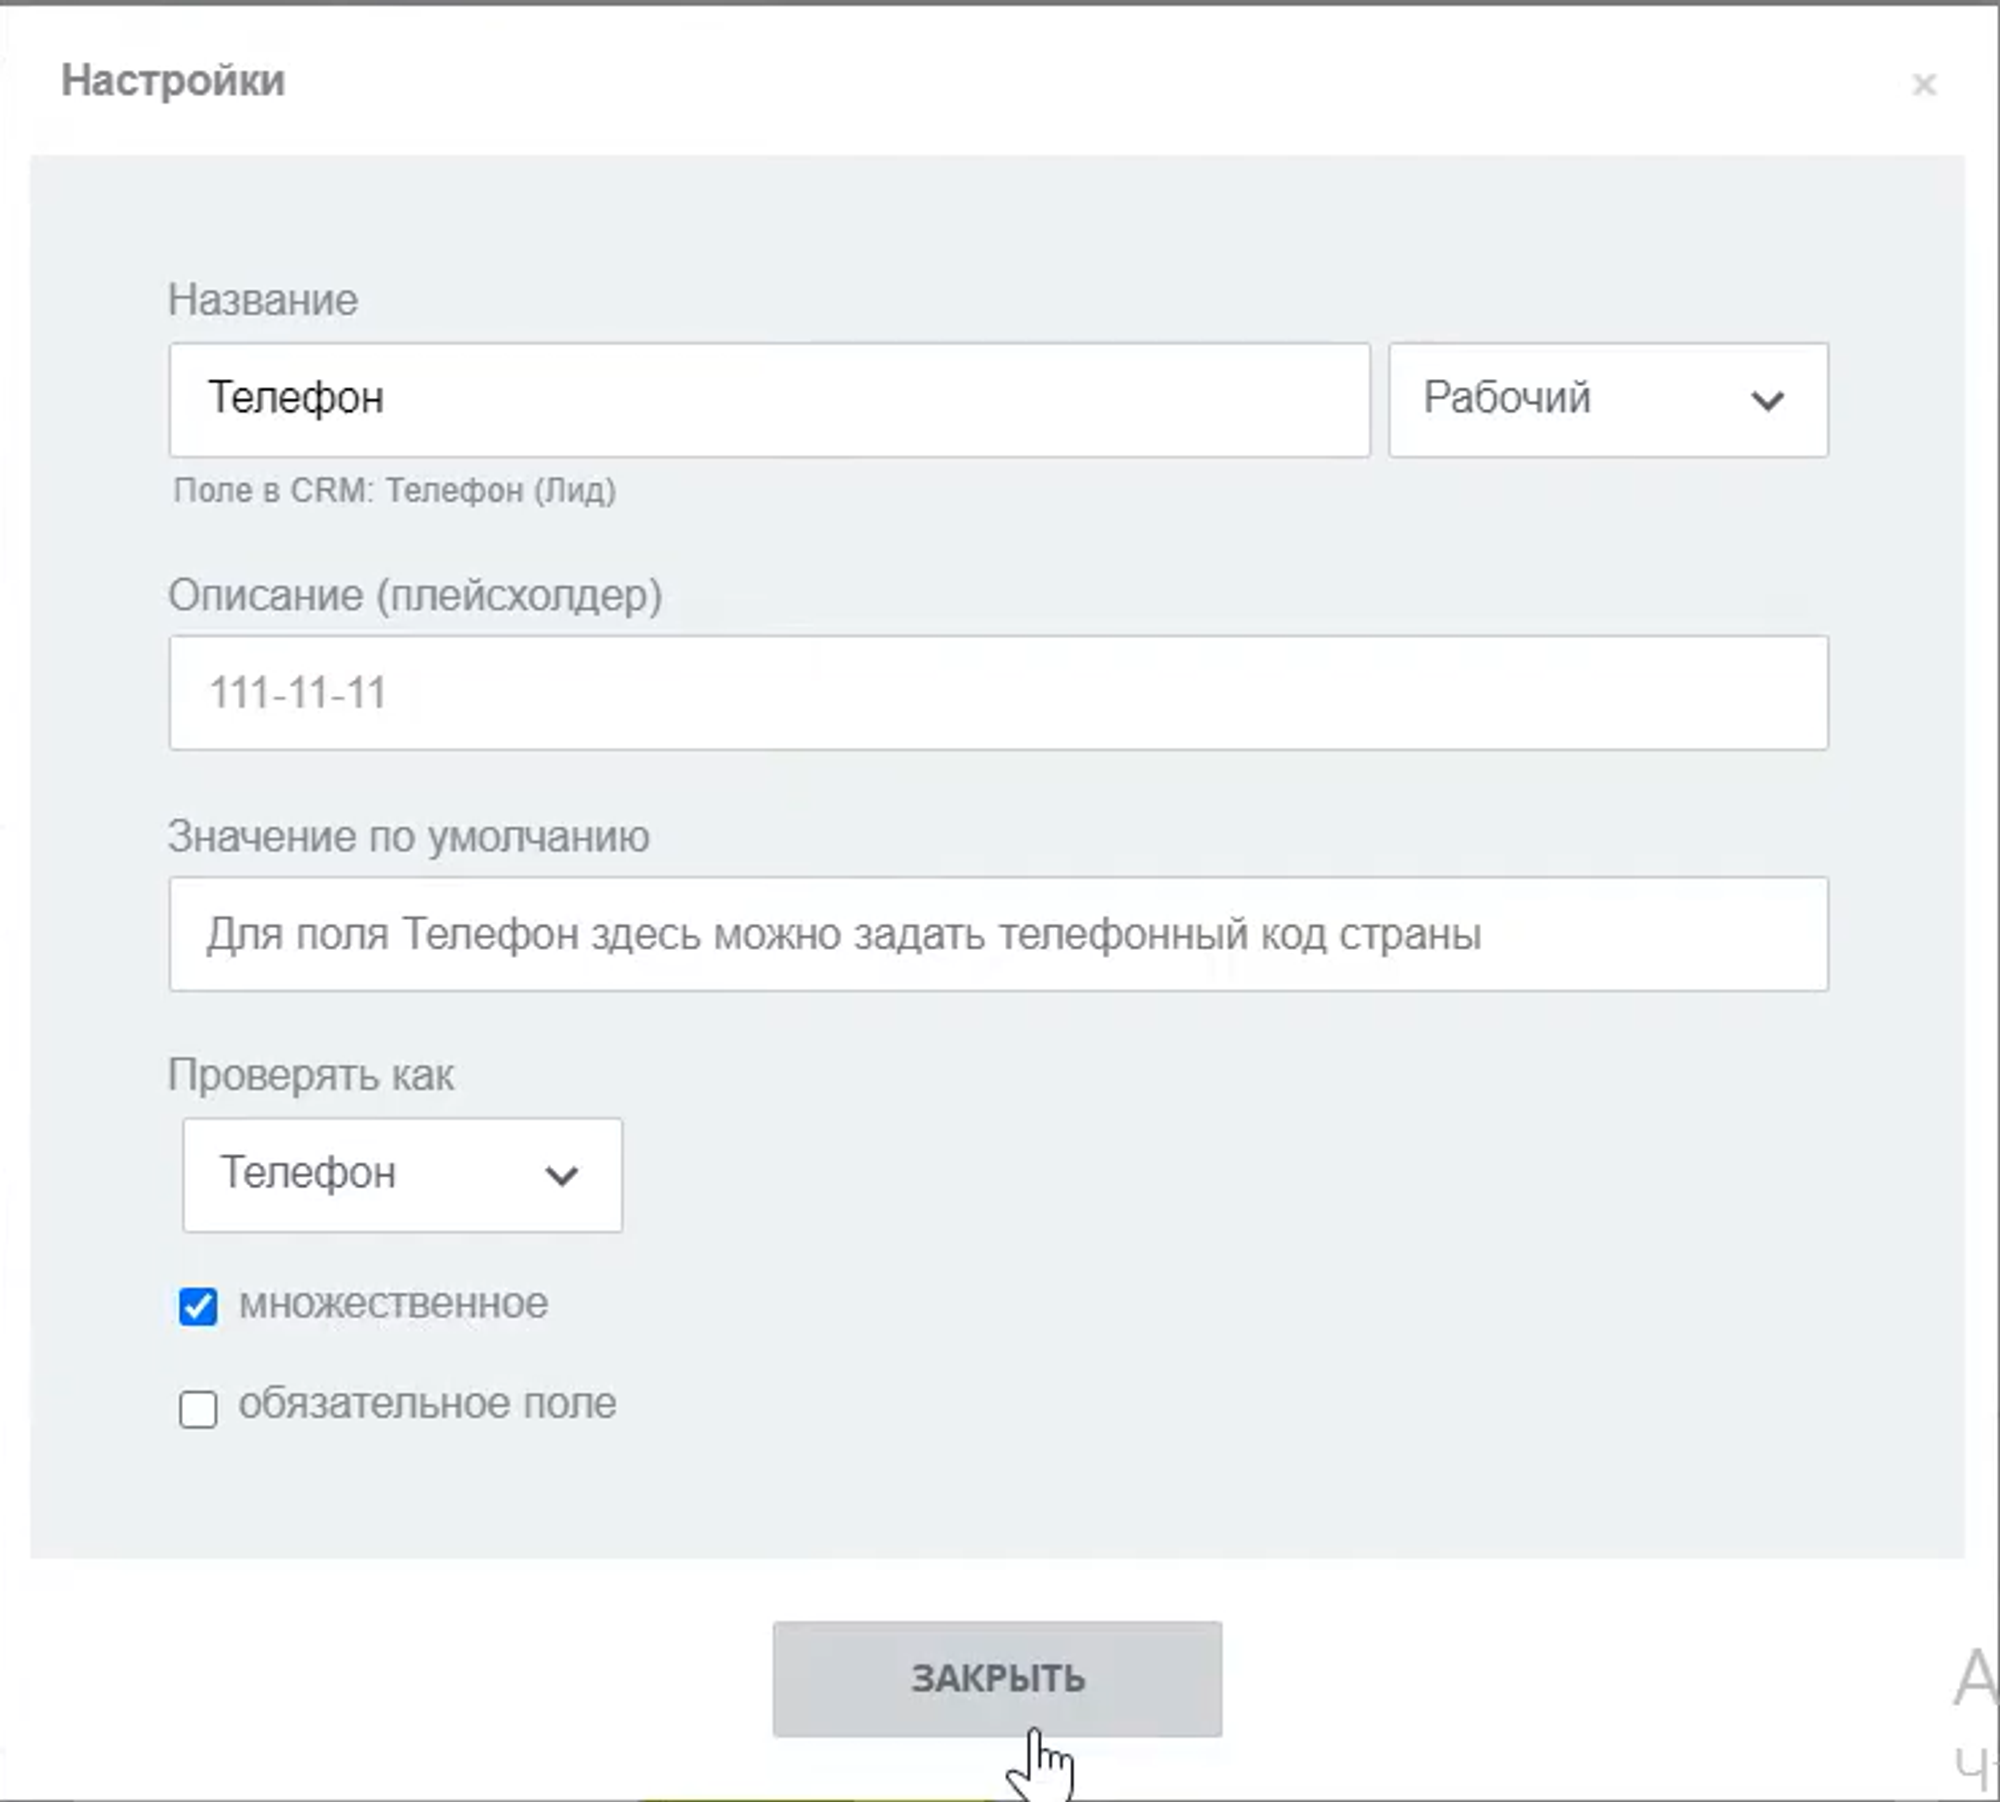
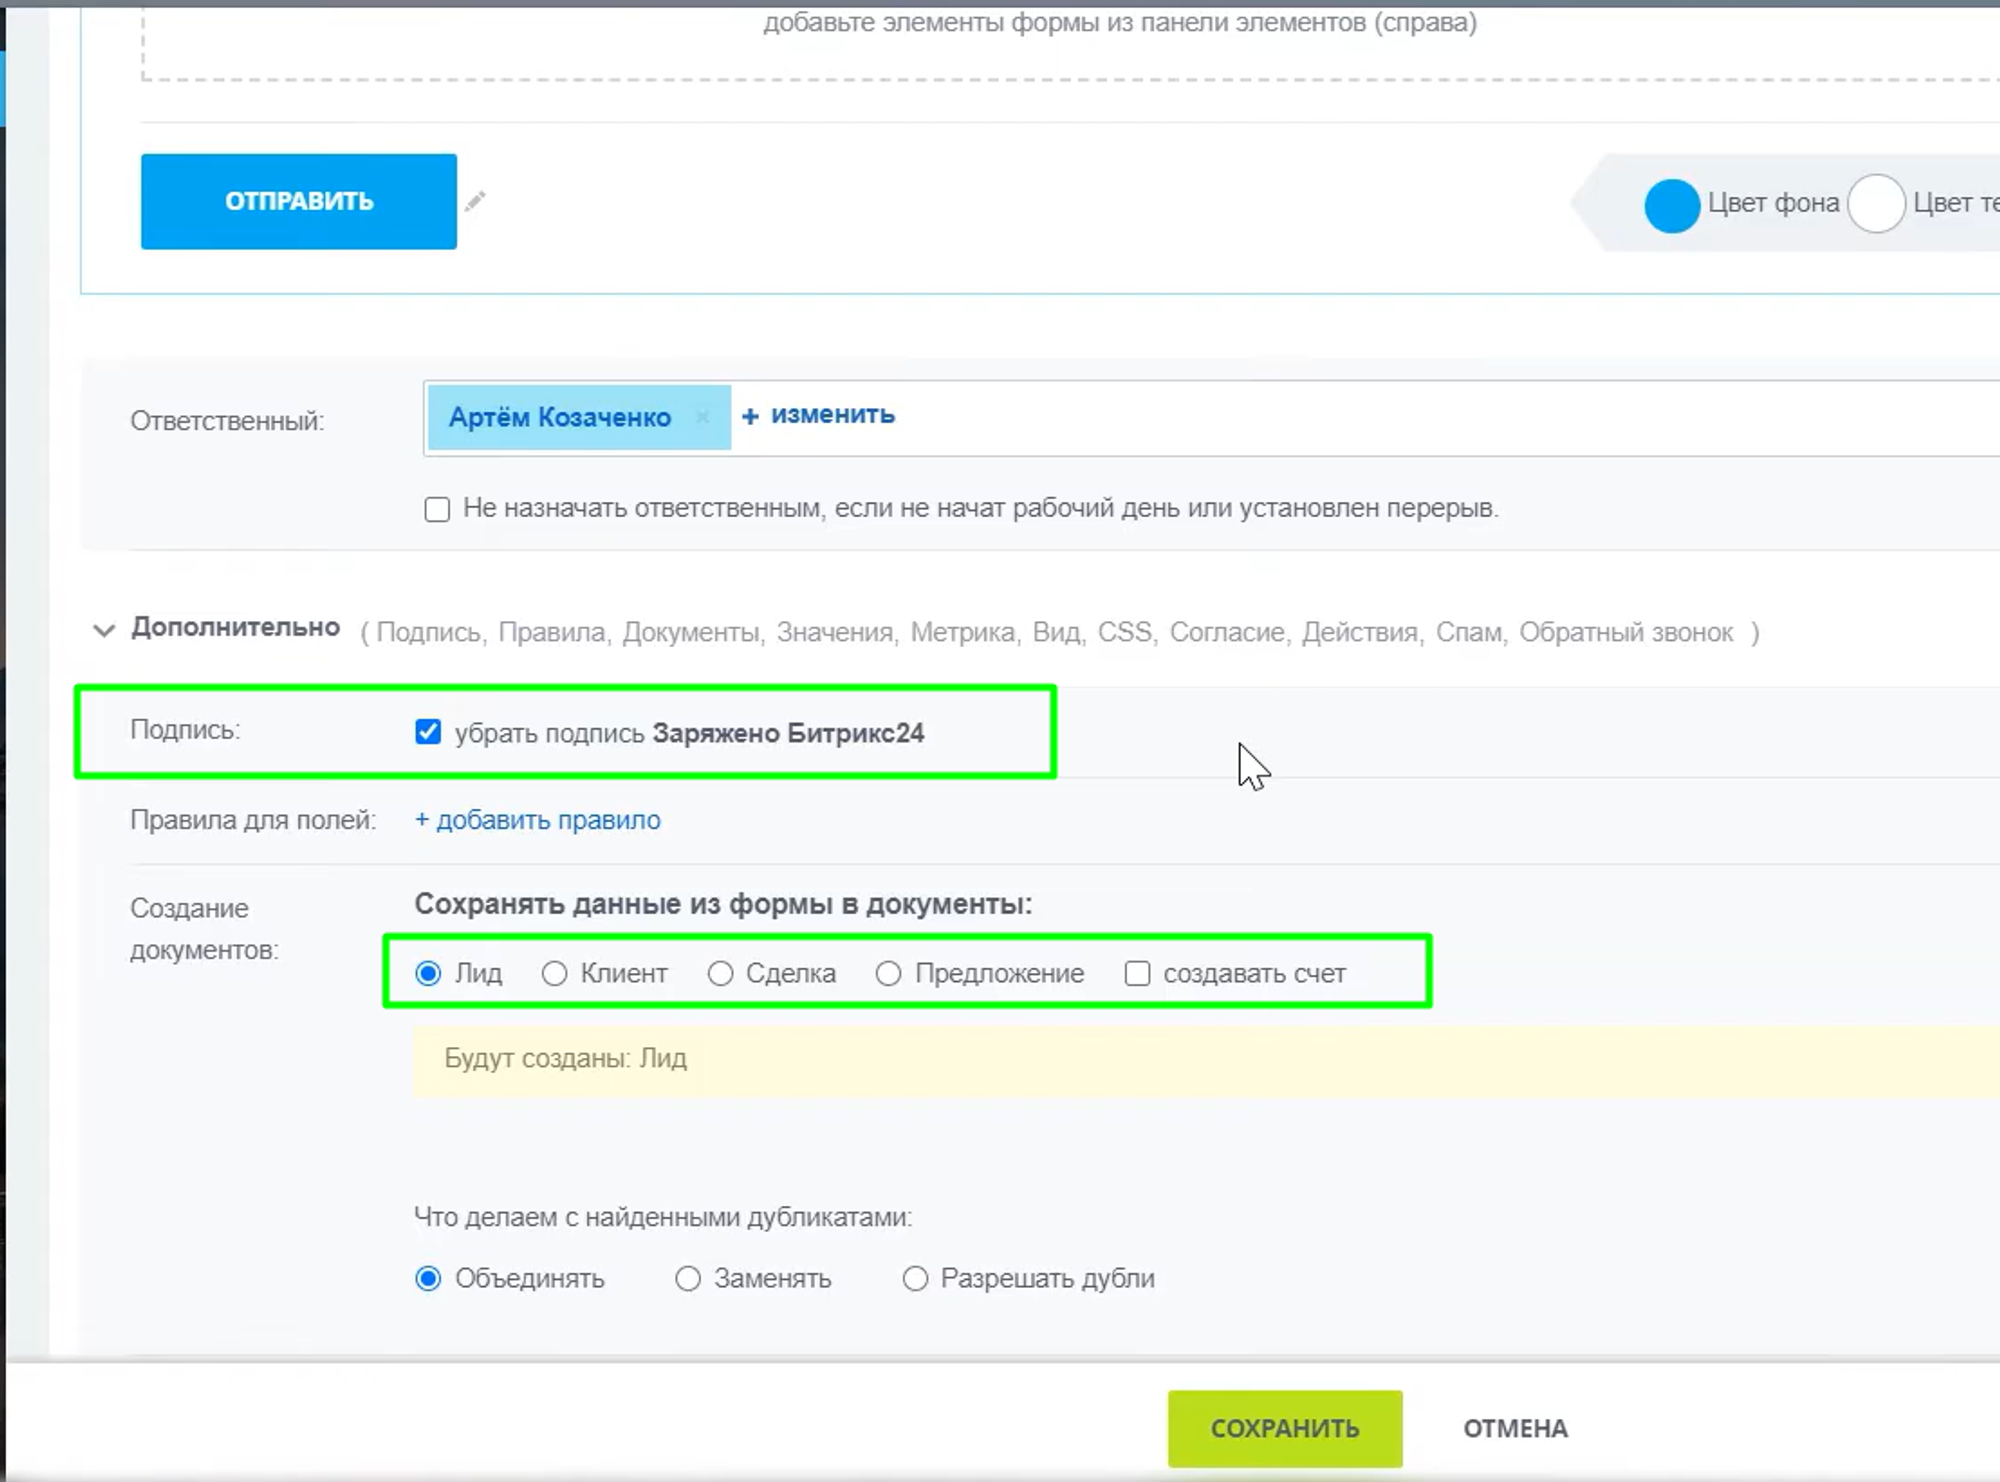
It is necessary to select a responsible person who will be responsible for the CRM entity after the client submits the form.
On the Advanced tab, uncheck Signature, and then select the entity that will be created when the form is submitted.
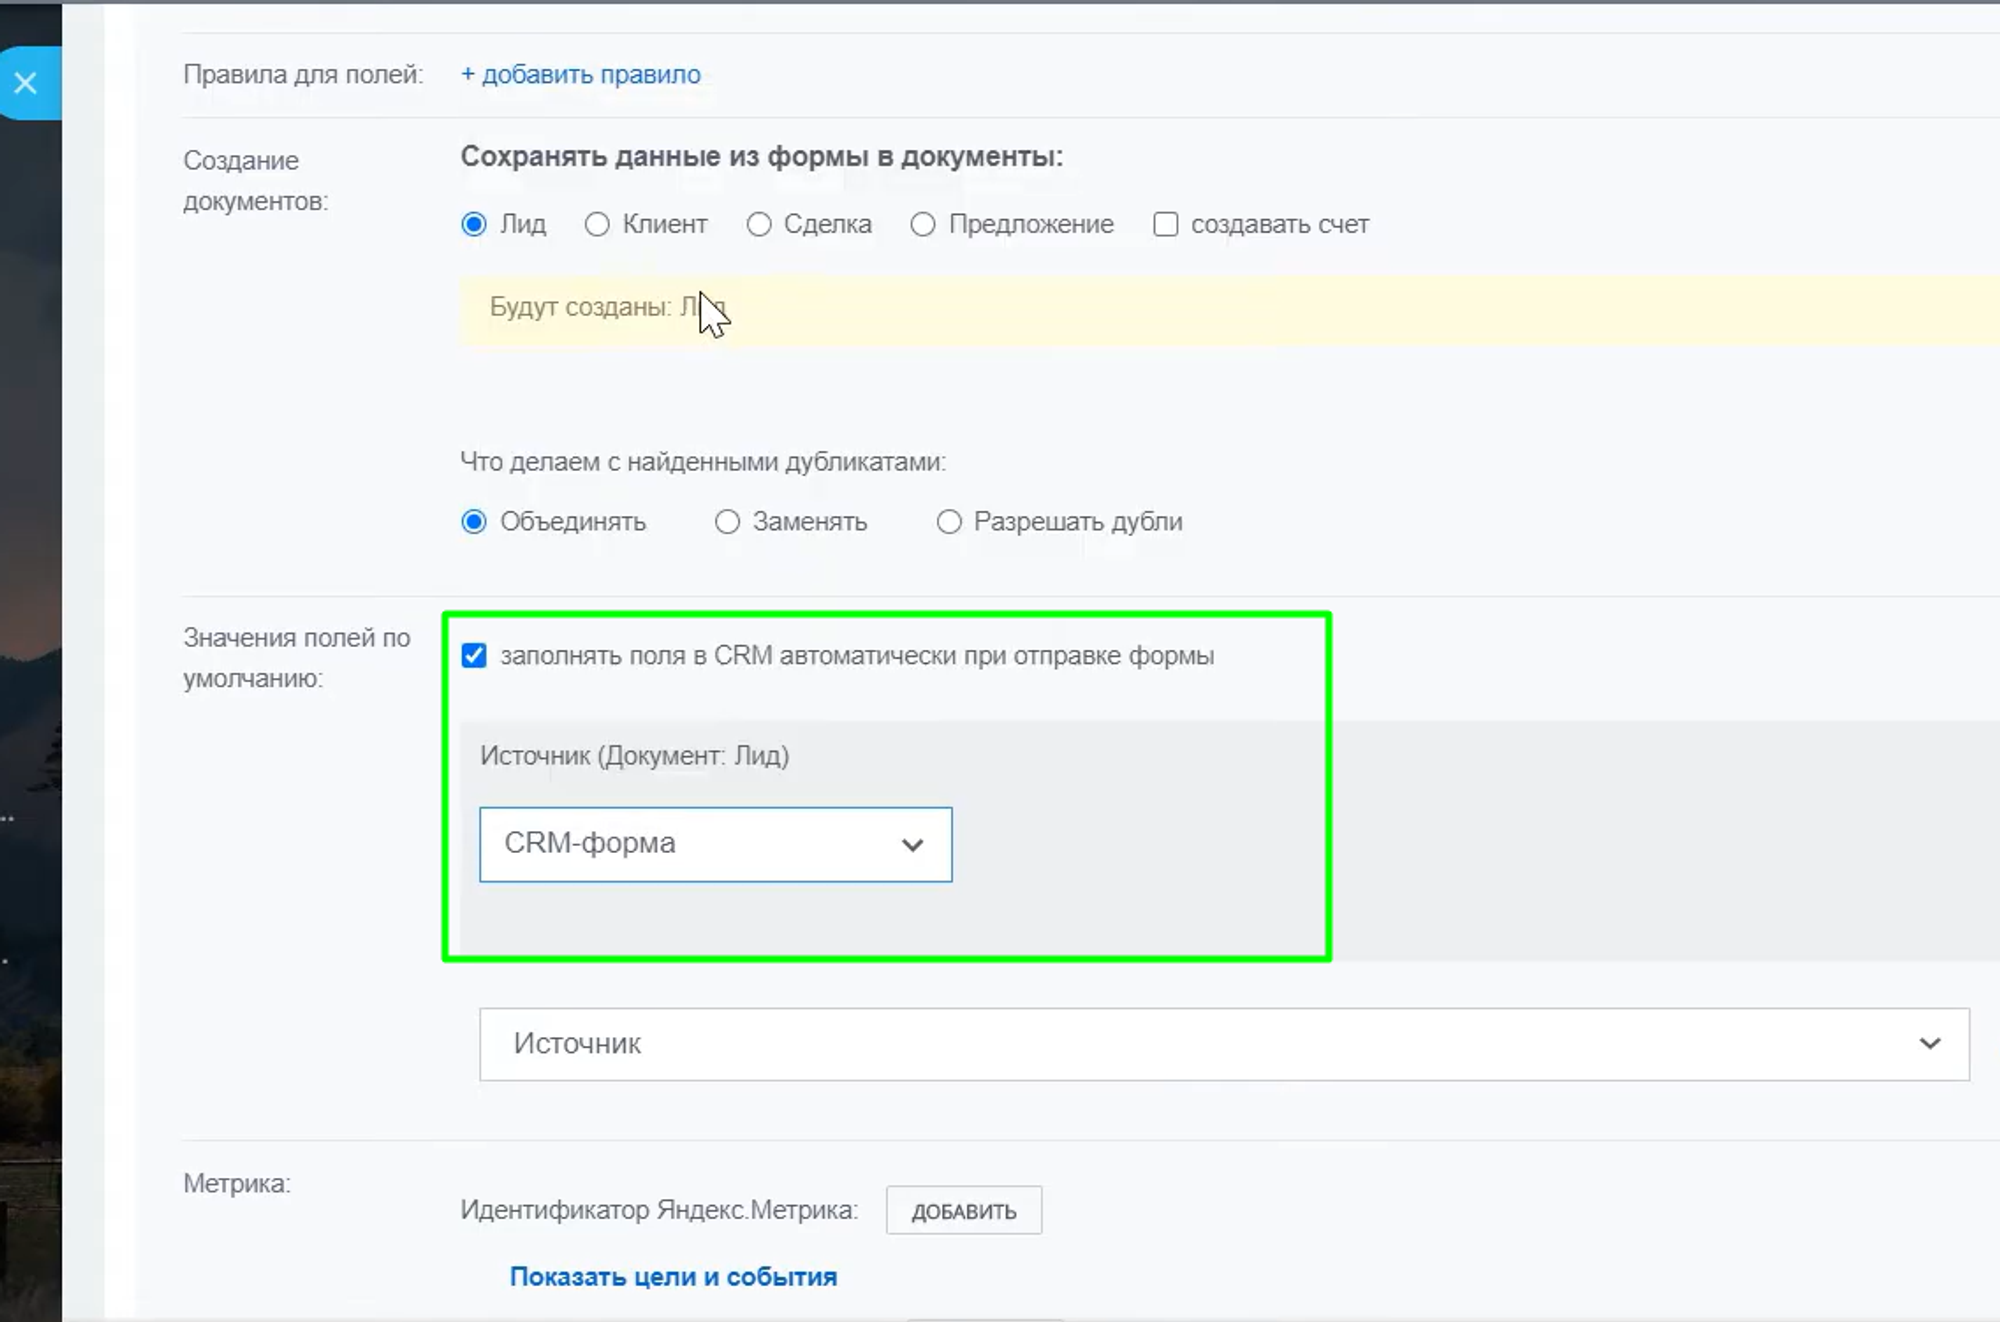
You can also add default field values. That is, those fields that are filled in with data automatically when an entity is created.
For example, you can select Lead Source, then click the Add Field button and select a CRM form.
You can also choose the appearance and style of the form, and use your own CSS styles.
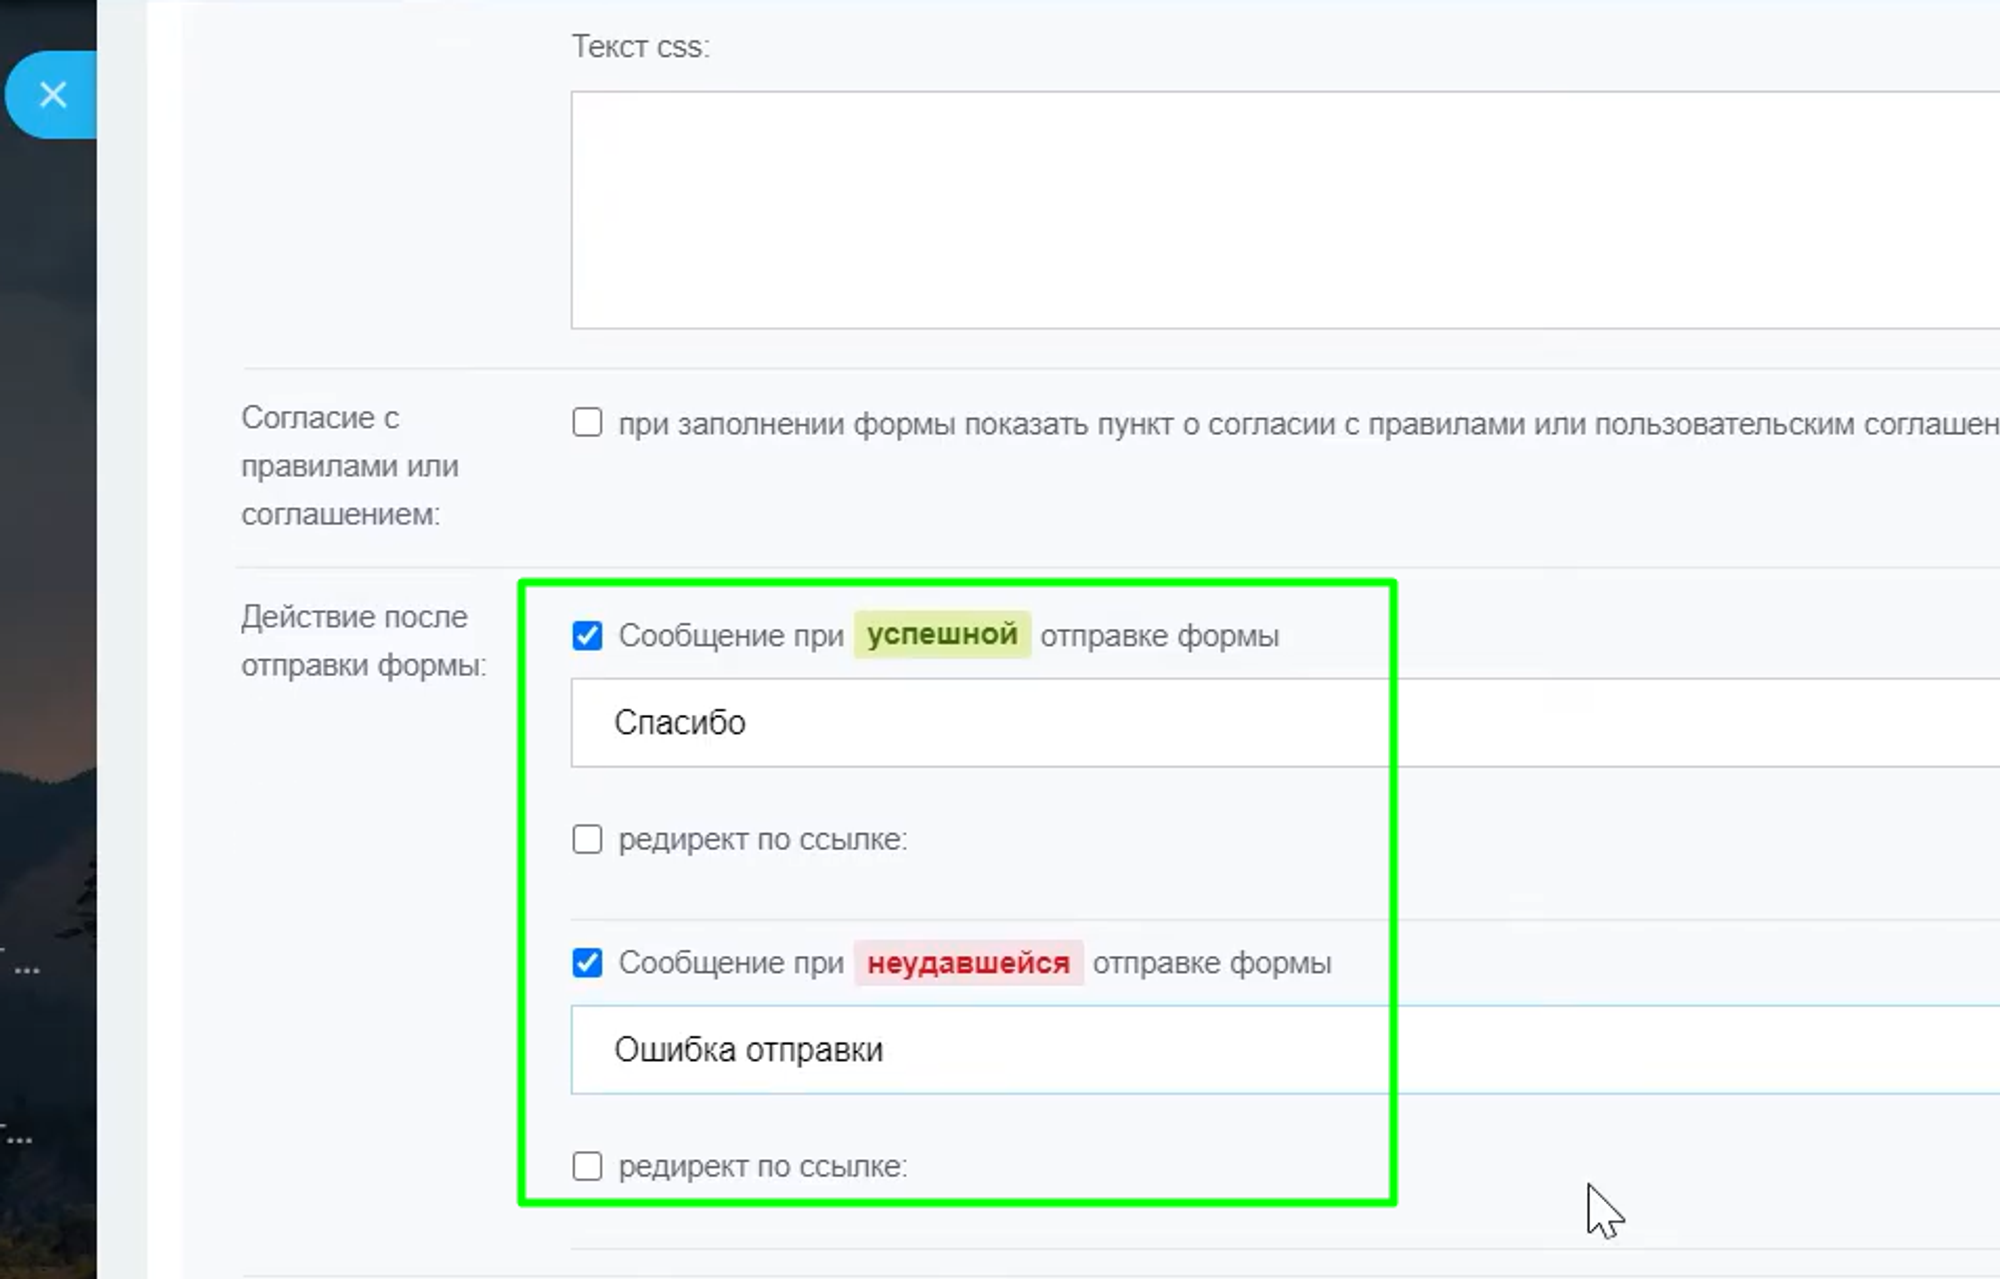
Add a message when the form is submitted successfully or unsuccessfully.
Saving the form and a link appears on the screen to go and test the form.
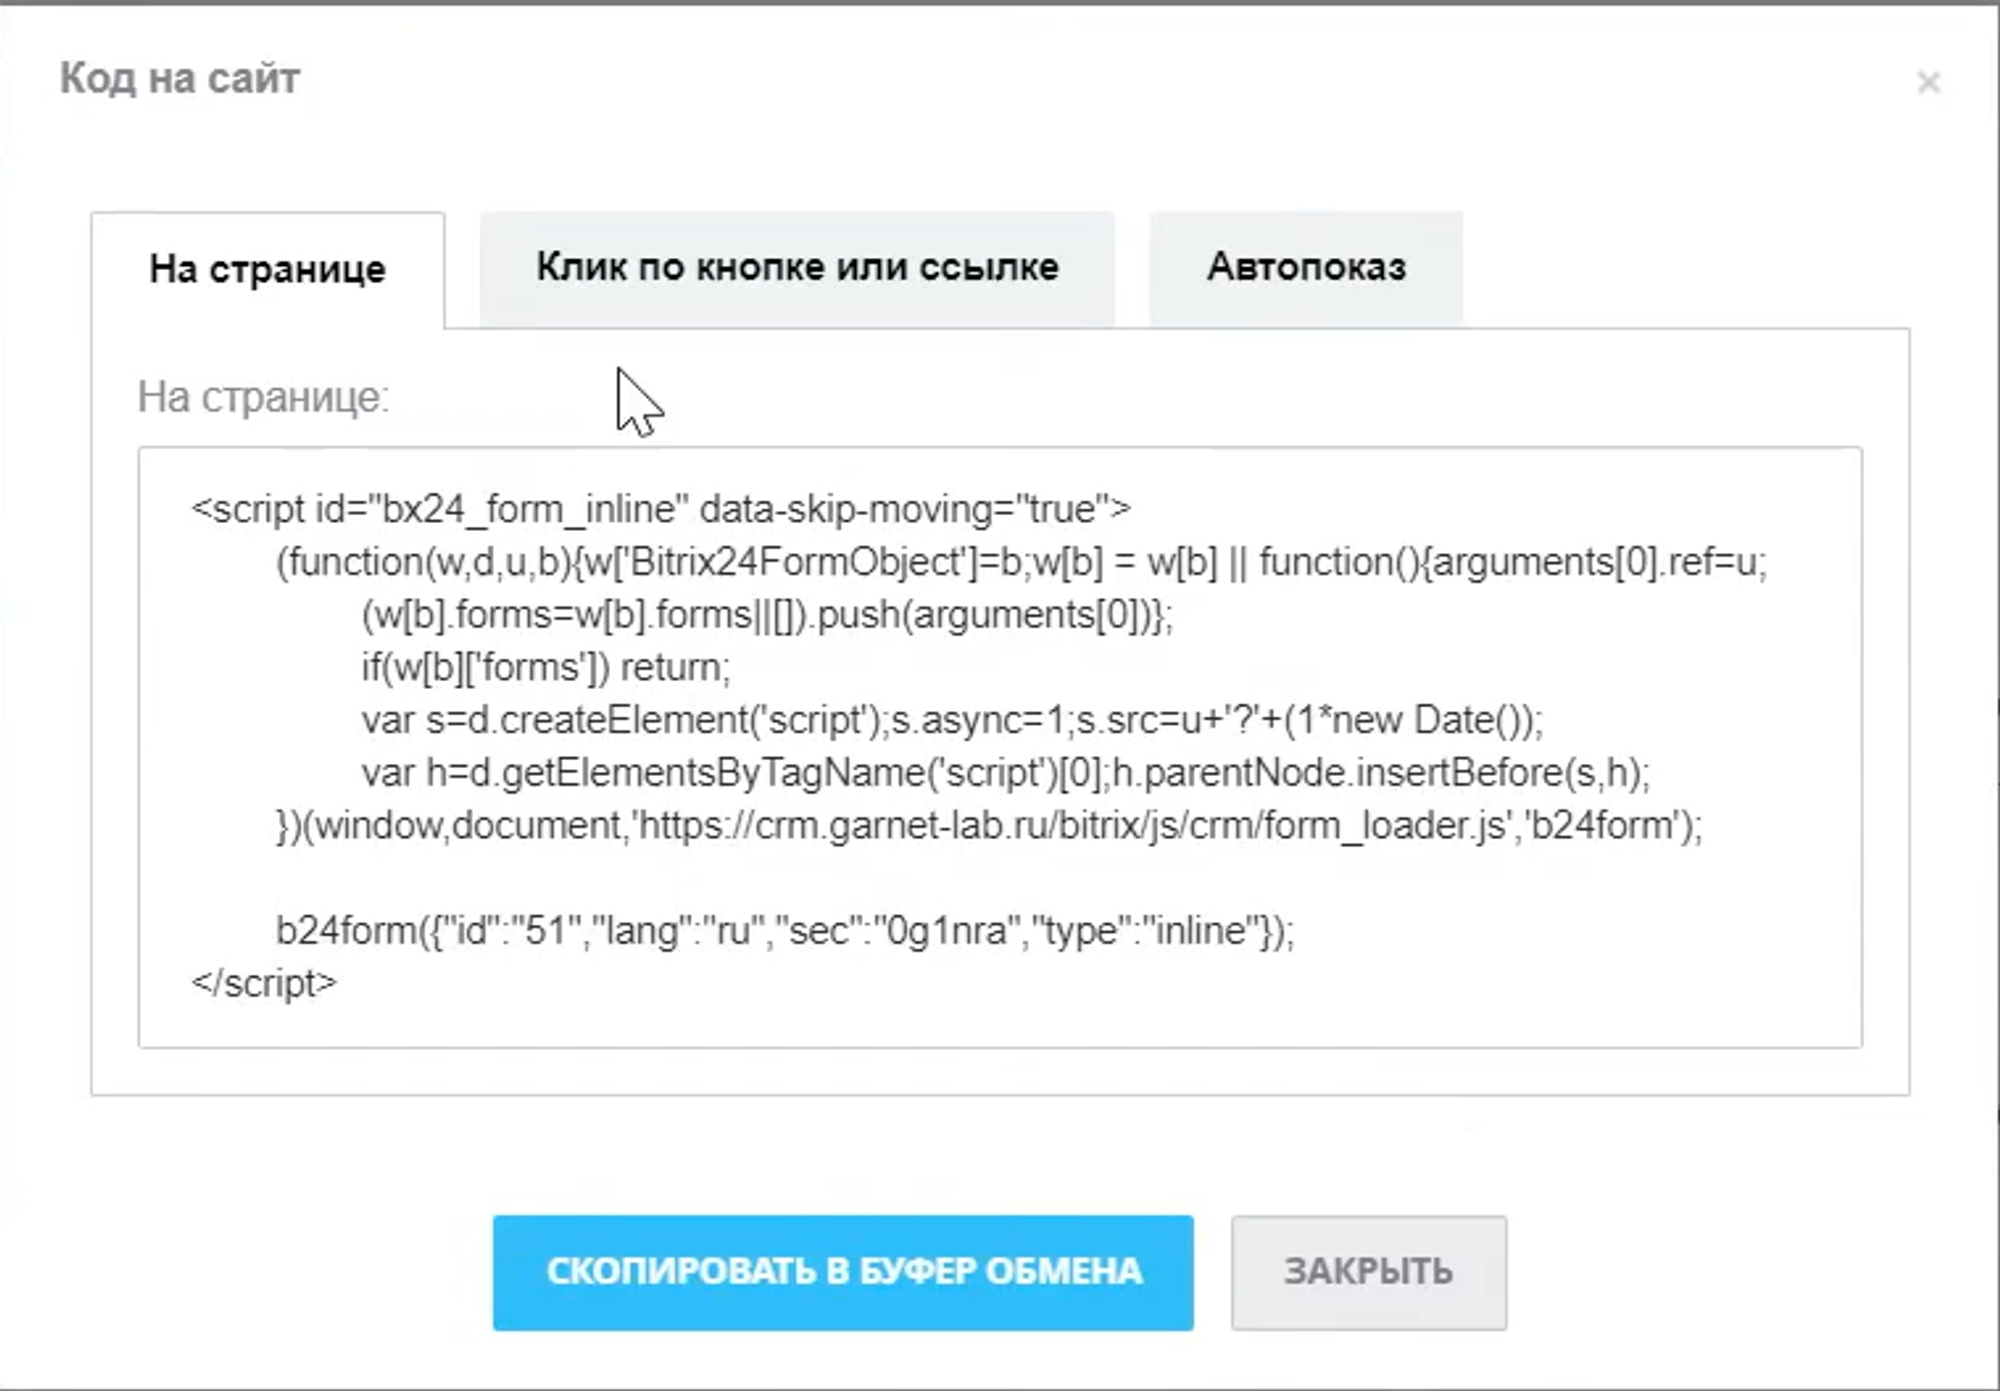
You can also click the “Code to site” button in the list and get a code to insert into the page.
To enable the form, click on the button in the list.
Inserting a form on a website using a widget
Let's look at what a form embedded using a widget looks like.
In the screenshot below you see a widget with social networks and online chat. You can insert the created form here.
To do this, in CRM, go to the “Settings” and “List of Widgets” sections. After that, click “Edit widget”.
At the bottom of the window there is a switch for inserting a CRM form.
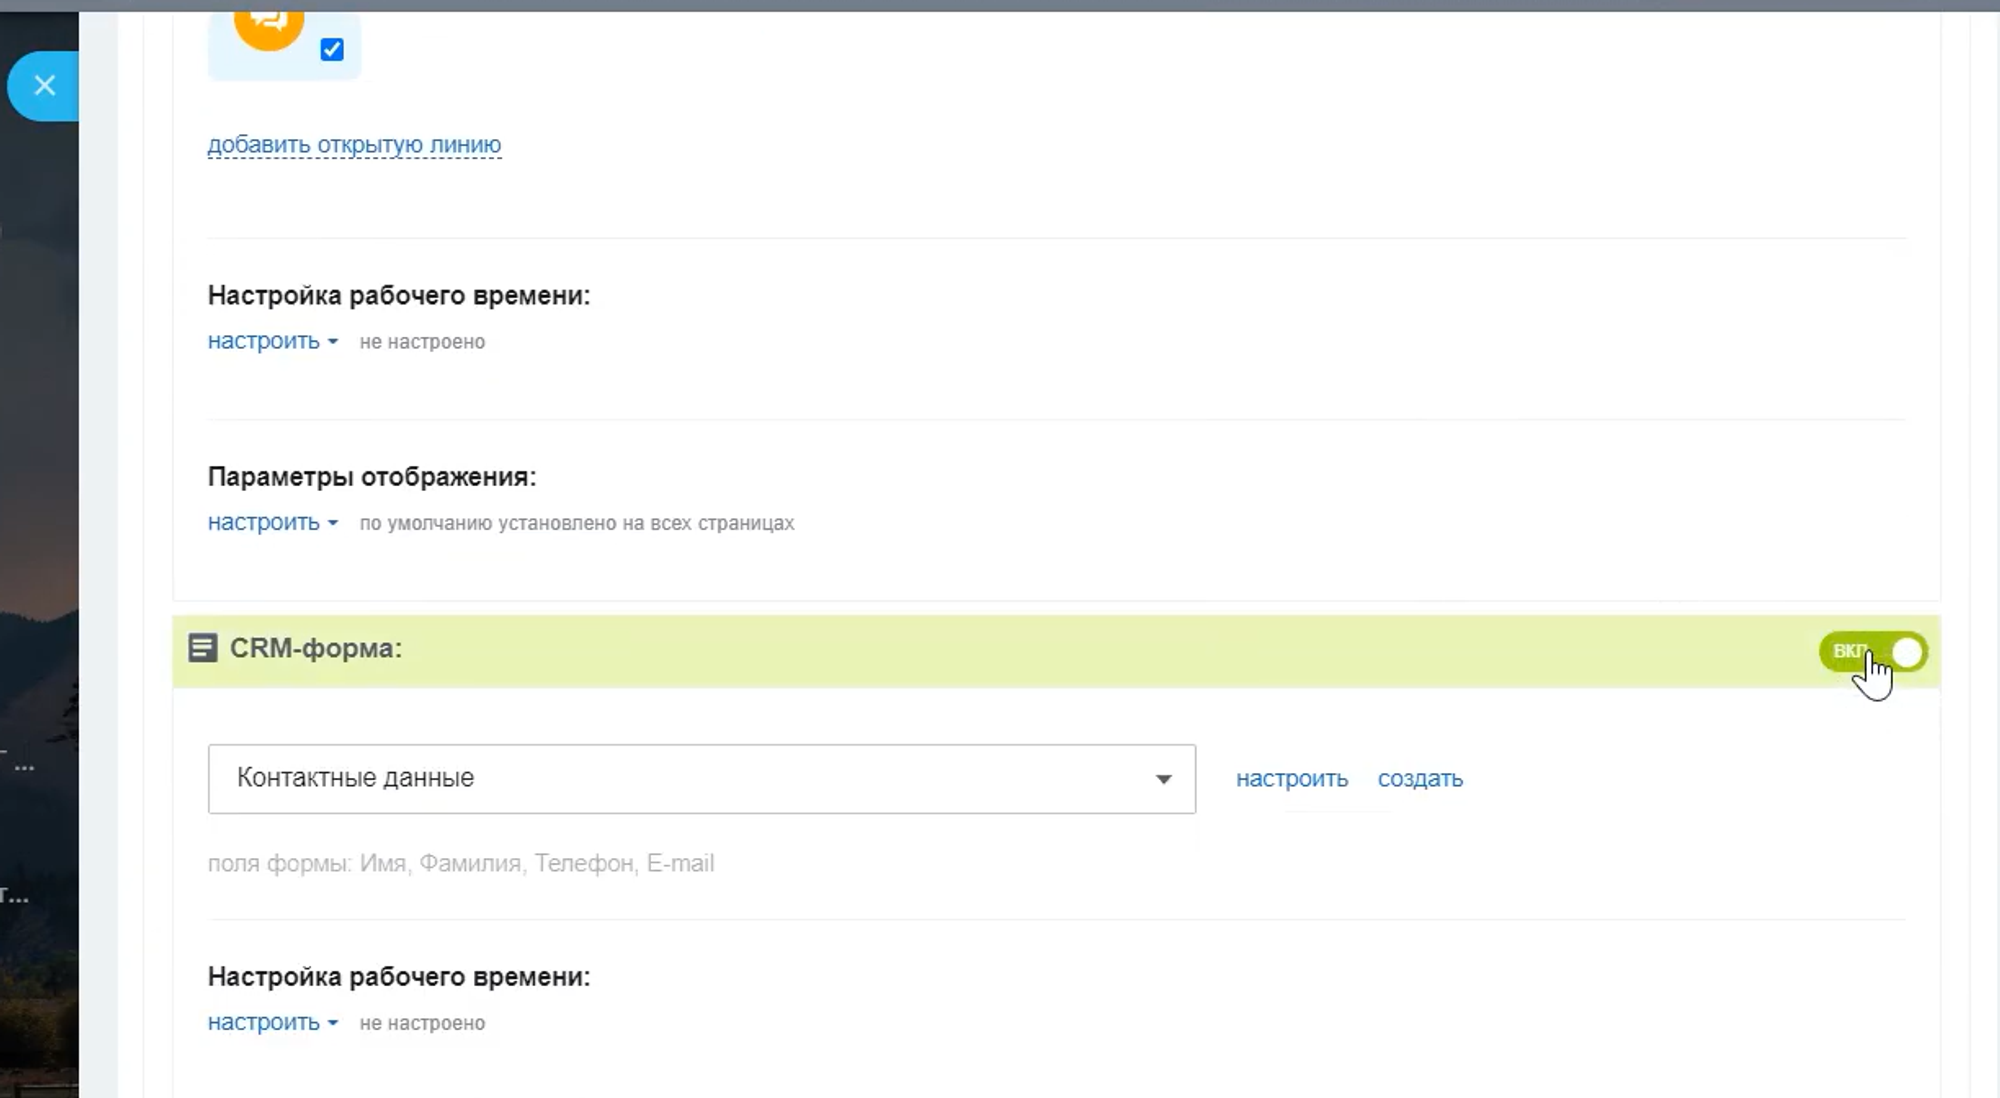
When you activate the switch, a list of forms will appear from which you need to select the appropriate one.
After saving, the form will appear in the widget.
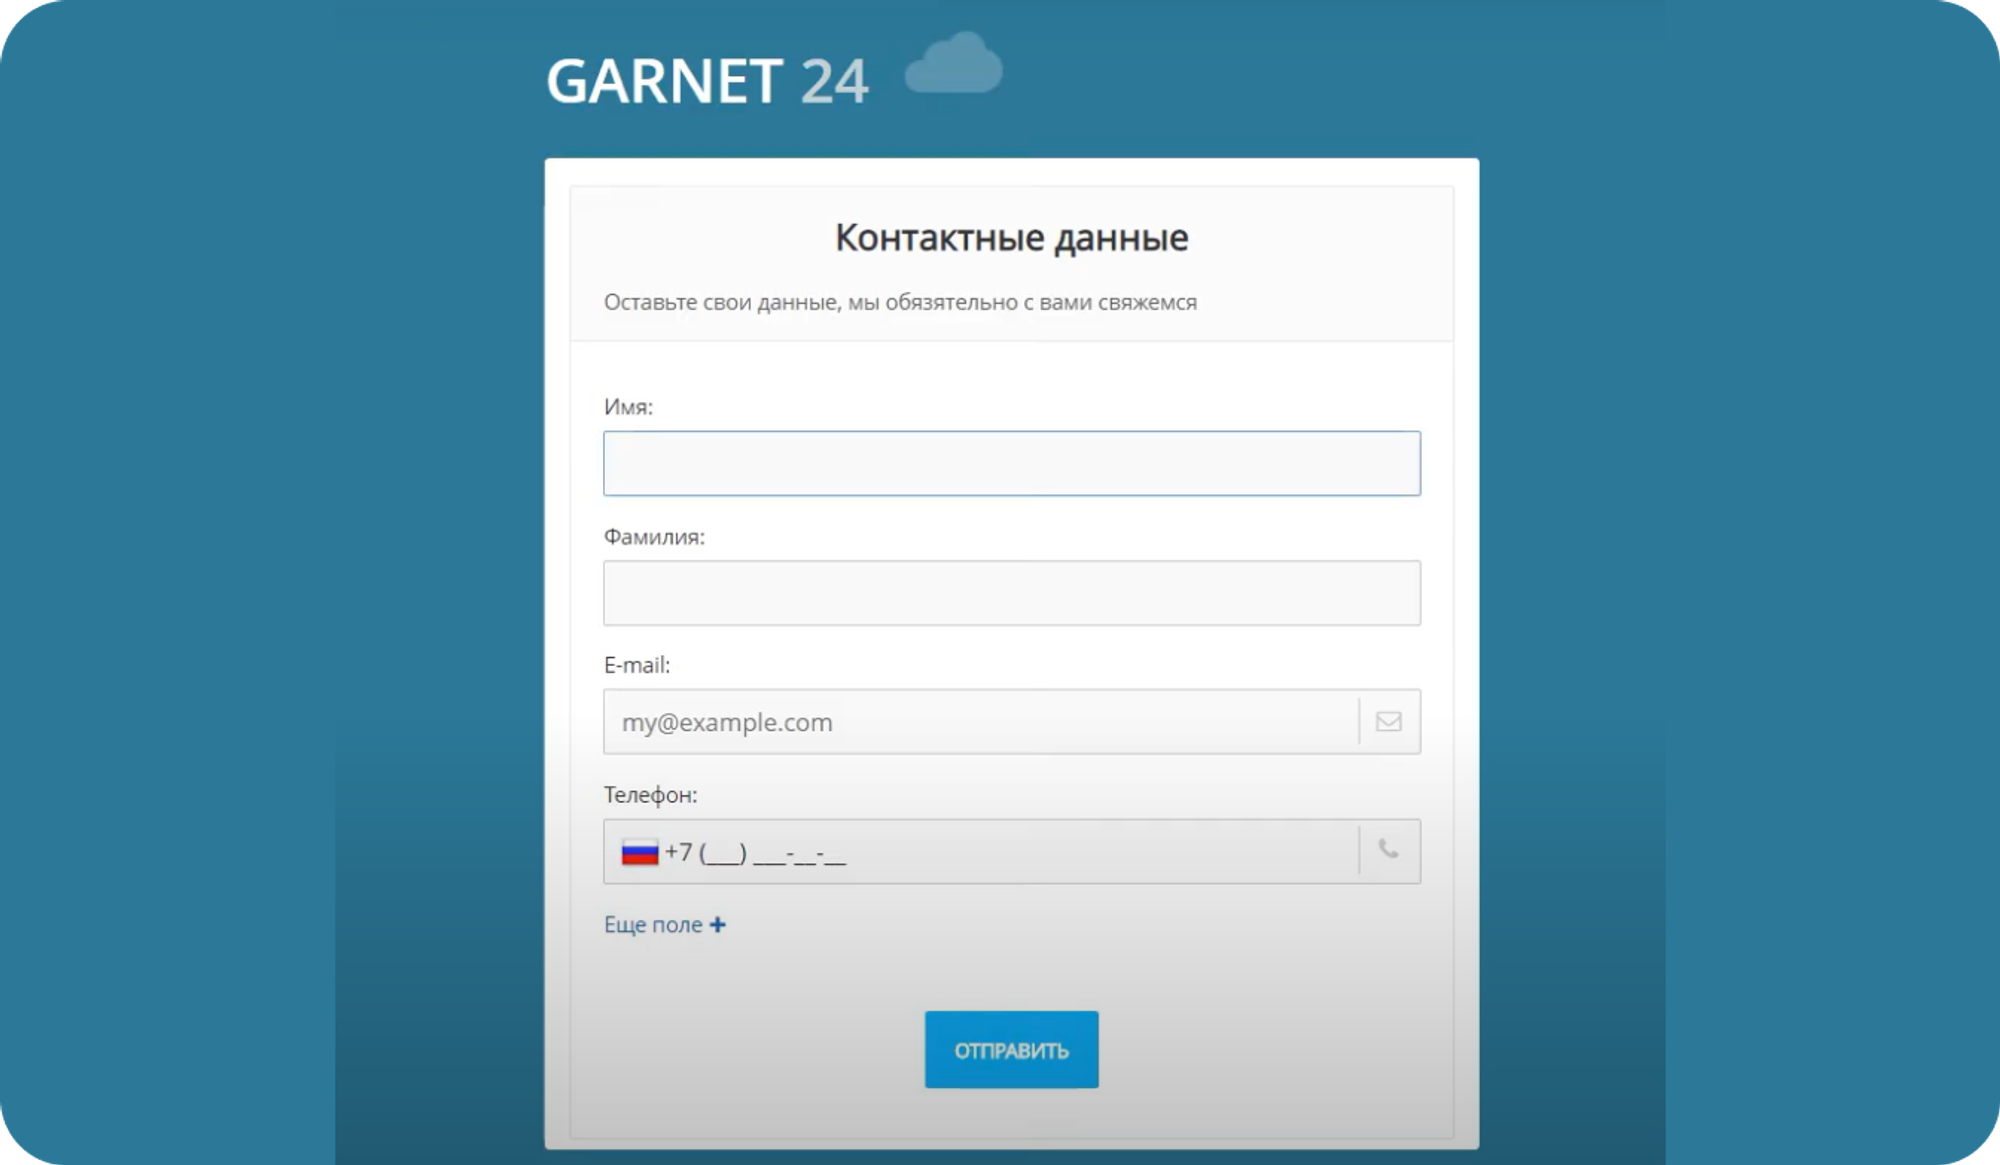
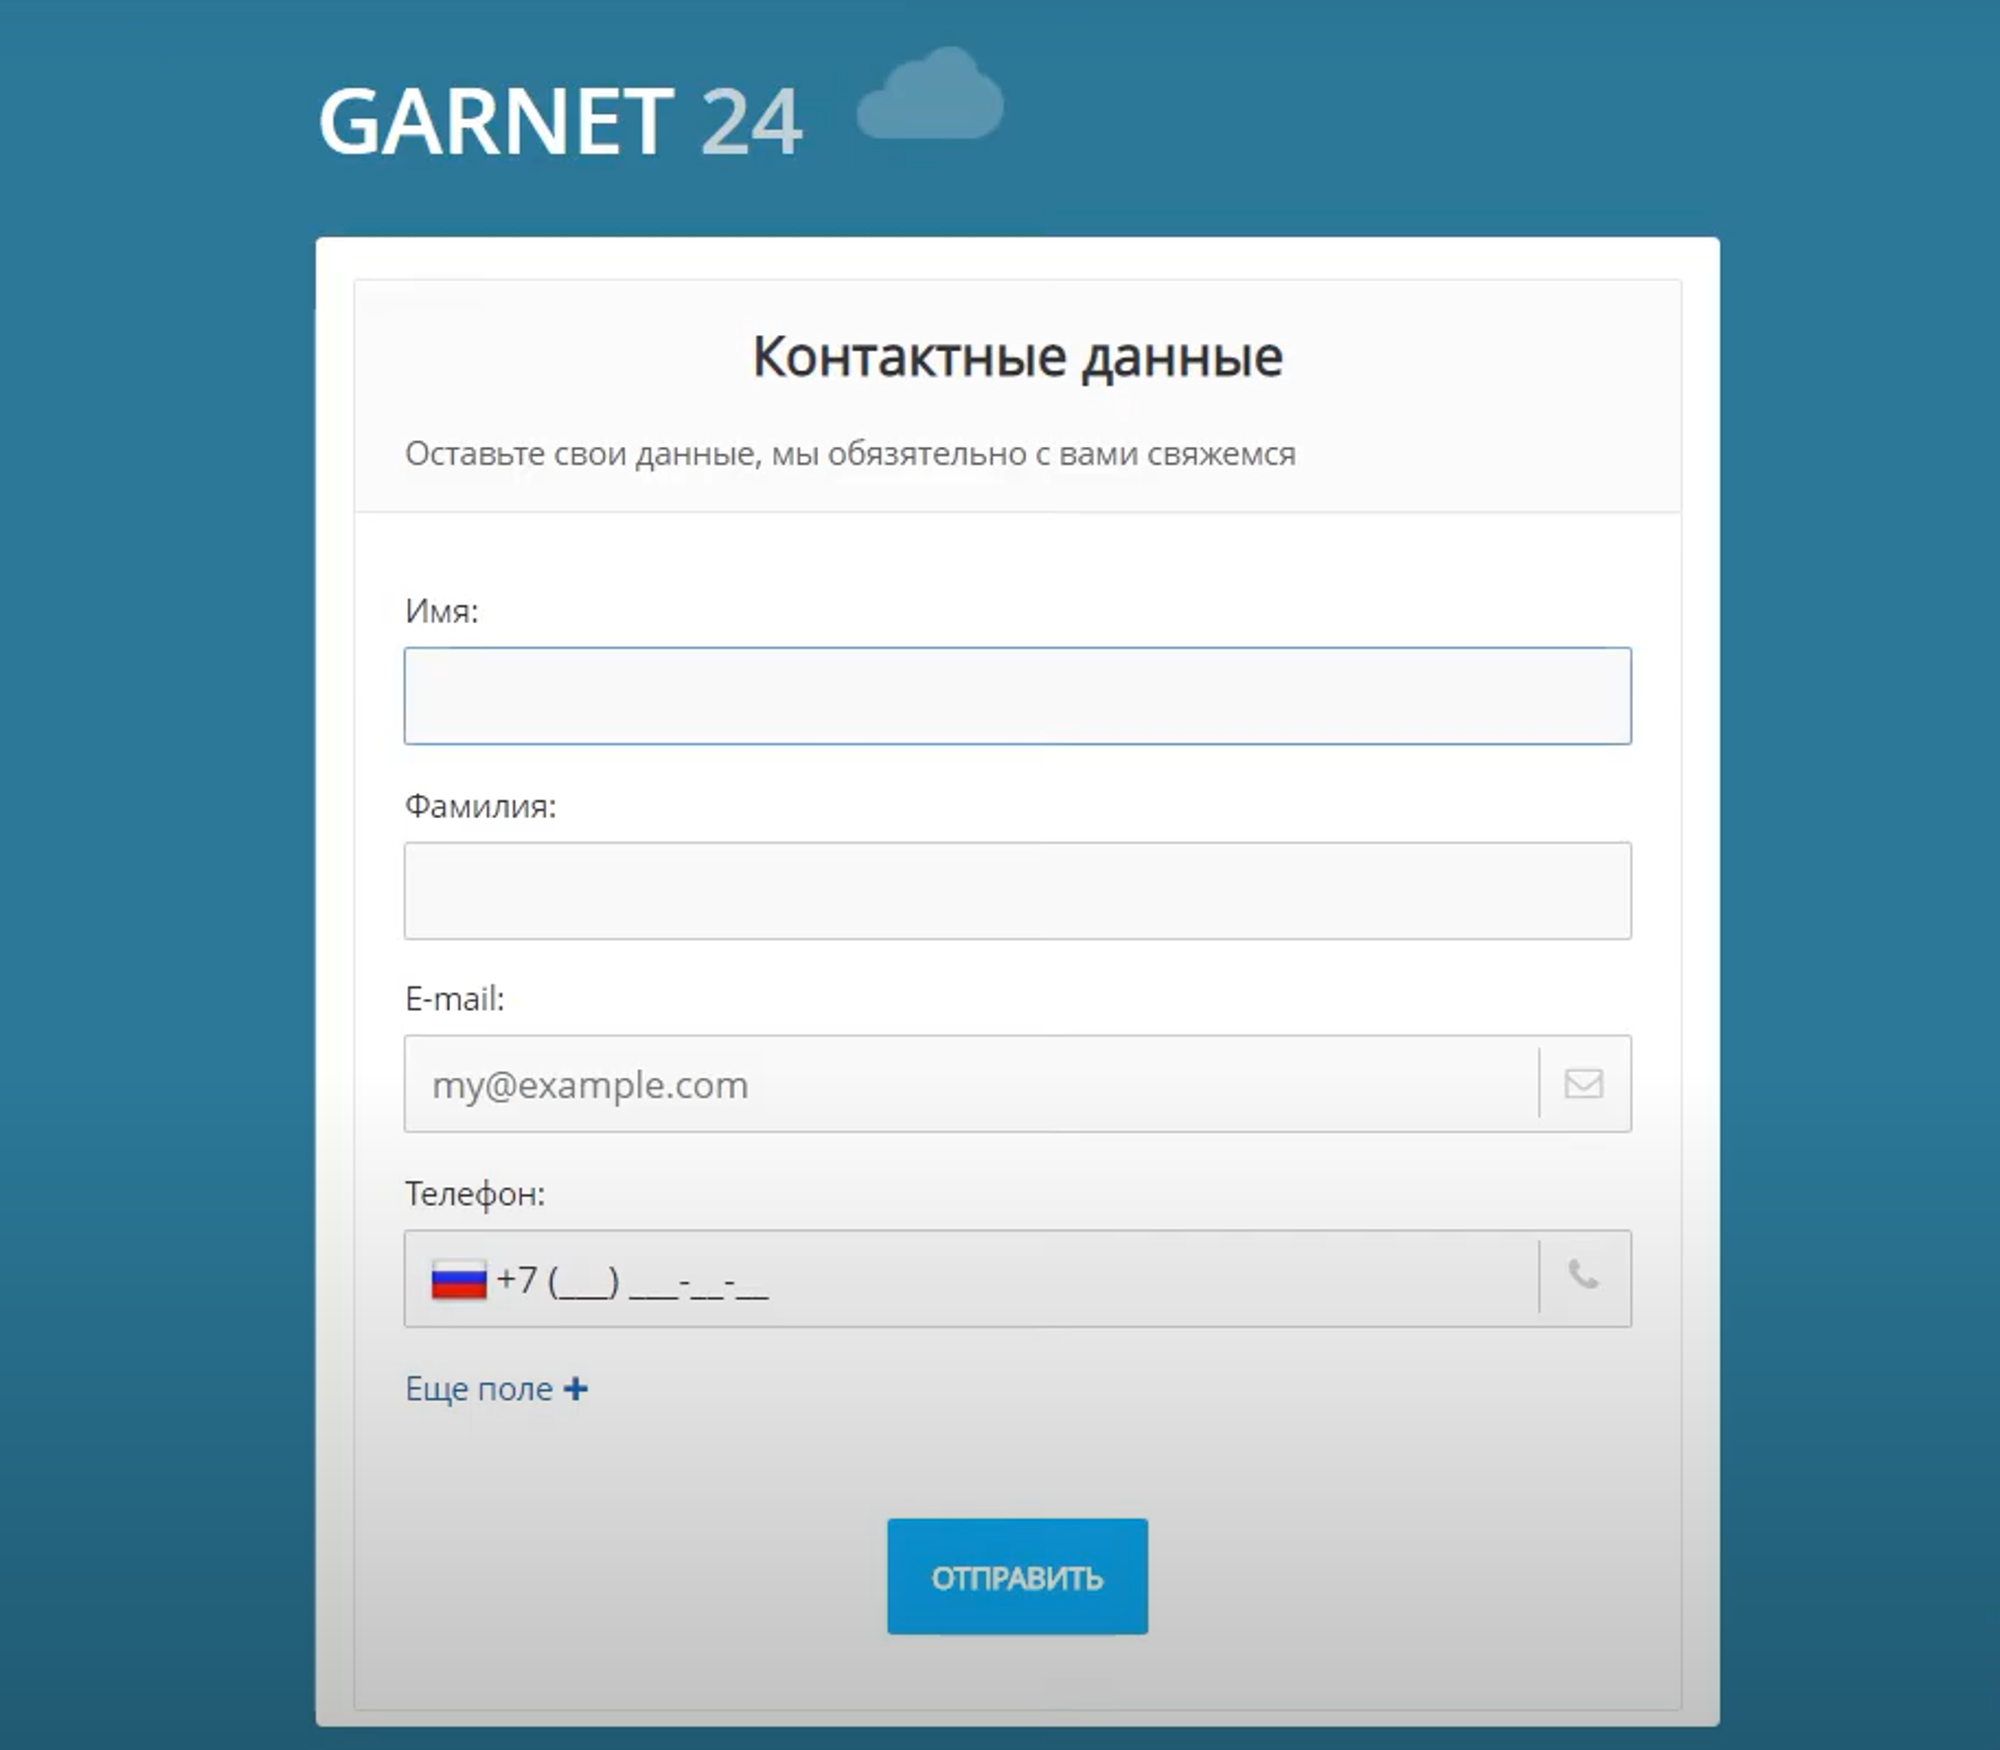
After filling out the form with data and successfully sending it to Bitrix24, a lead is created.
In our example it will look like this:
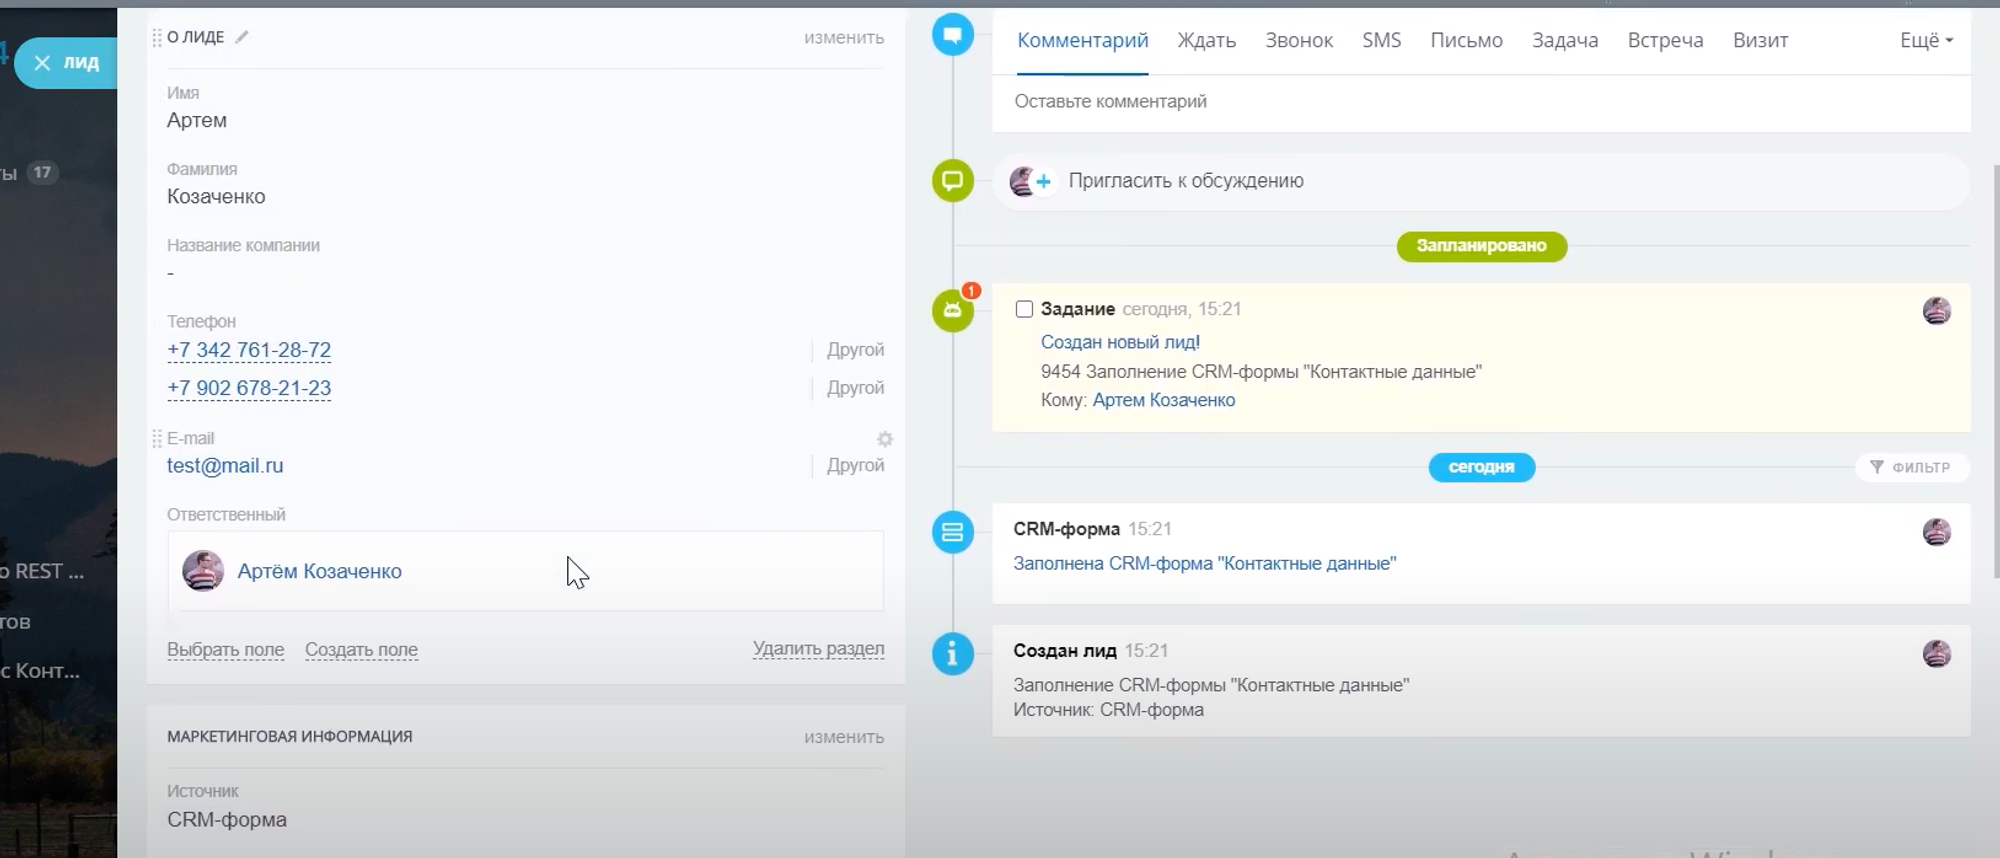
The first and last name, phone numbers, email are filled in, the source is visible.
Have questions or need to find a solution to Your problem?
Leave a request by filling out the feedback form. Our expert will contact you as soon as possible