Автор статьи
Глеб Антоненко
Submission of forms
Official documentation
Integration of web form and CRM Bitrix24
Example of setup
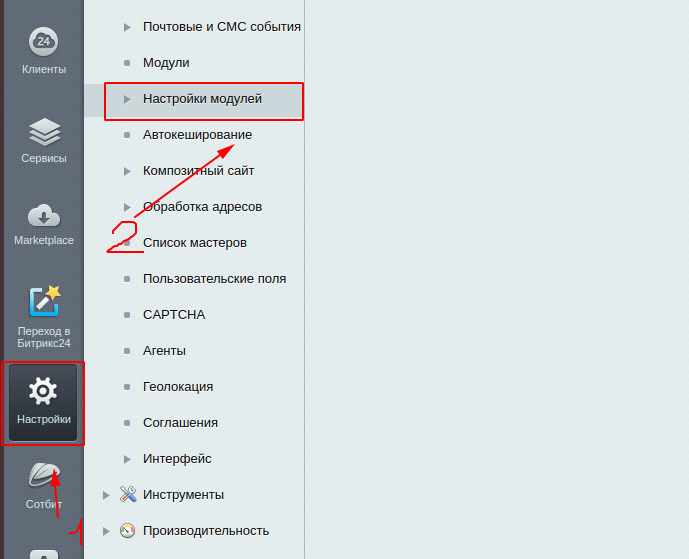
Go to the module settings and create “Connection with CRM”:

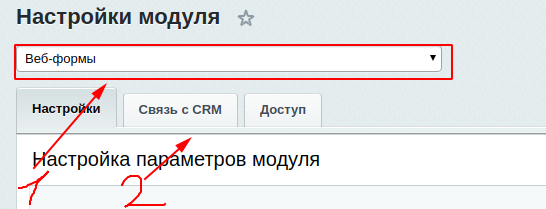
Select web forms and the “CRM Connection” tab:
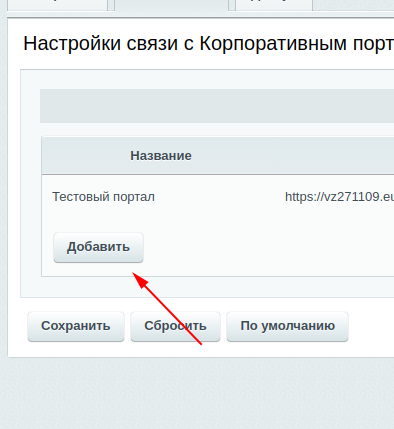
Click on the add button
Enter CRM server data
The “Path” field will be automatically filled in when you enter the CRM server address.
In the login and password fields, enter the data of the user who will be responsible for leads by default.
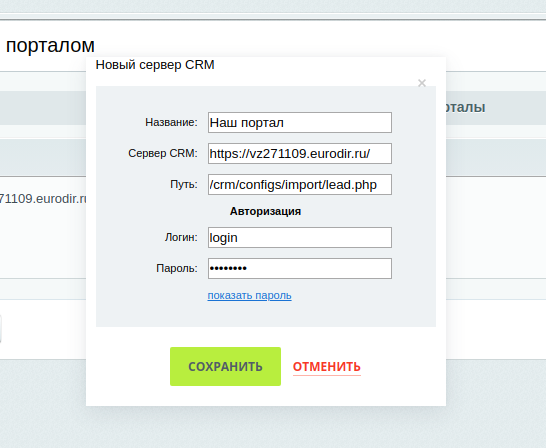
Click the save button twice.
Setting up integration of a specific form with CRM
Go to Services->Web Forms->Form Settings
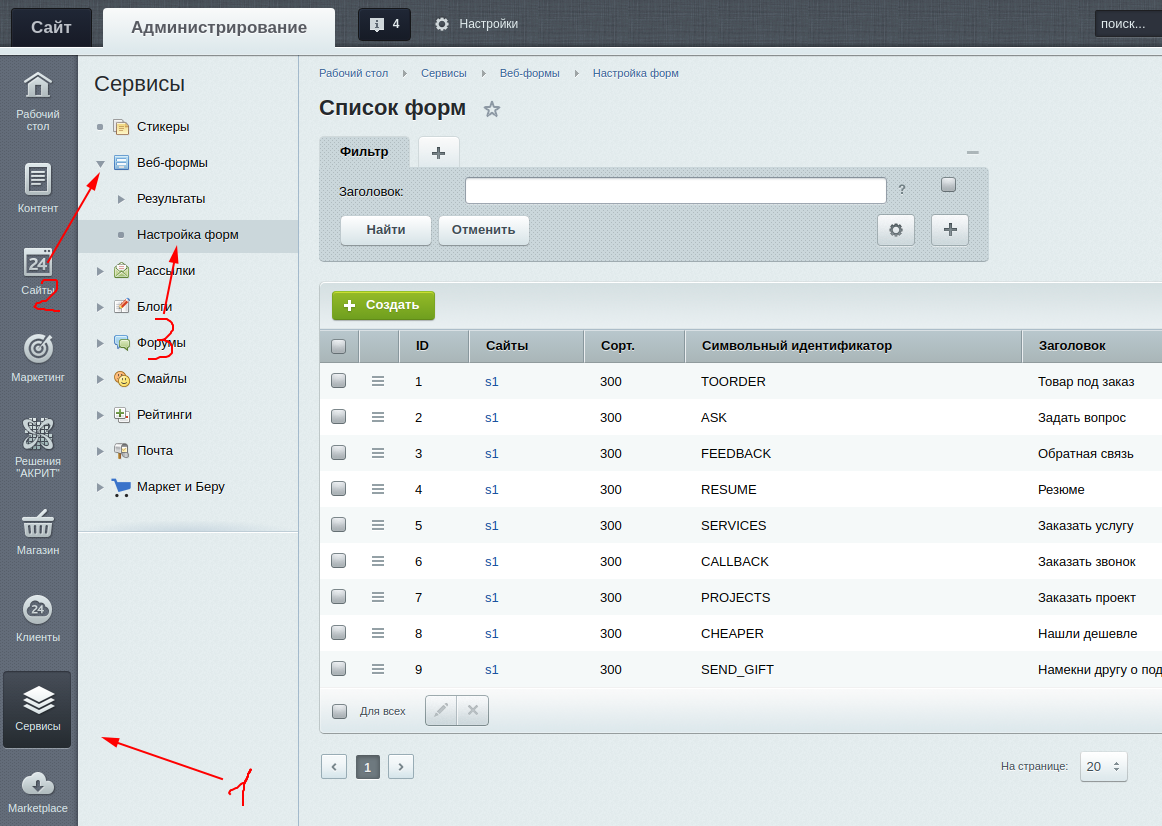
Select the form we need and click the “Change” button

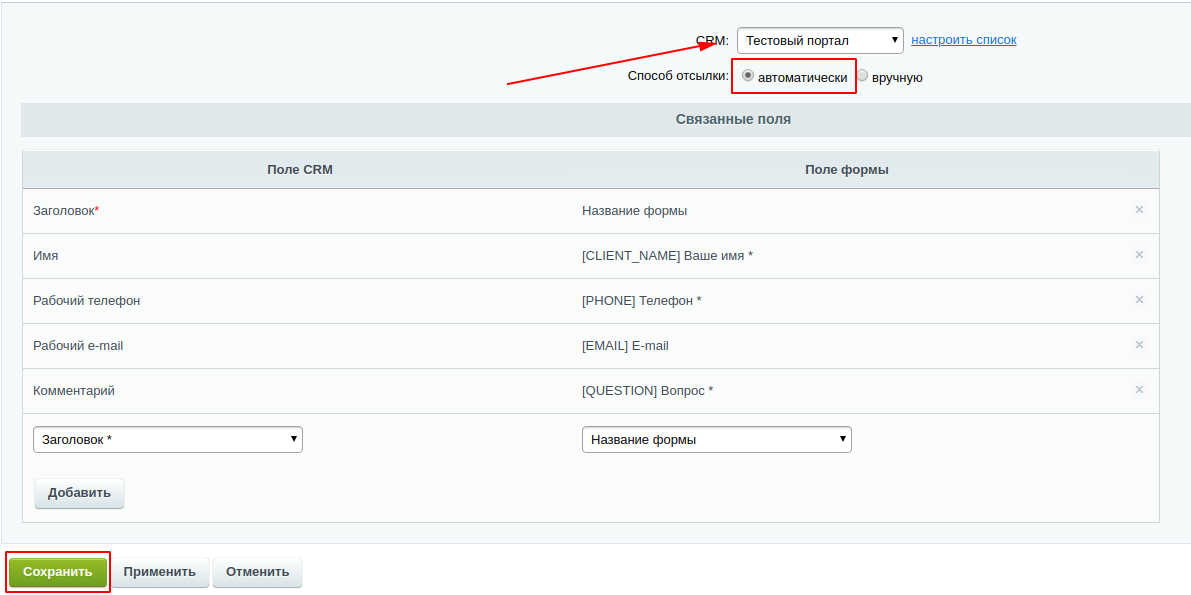
Go to the “CRM” tab

Select our created portal in the “CRM” field. Add and synchronize the fields we need. Click the save button.
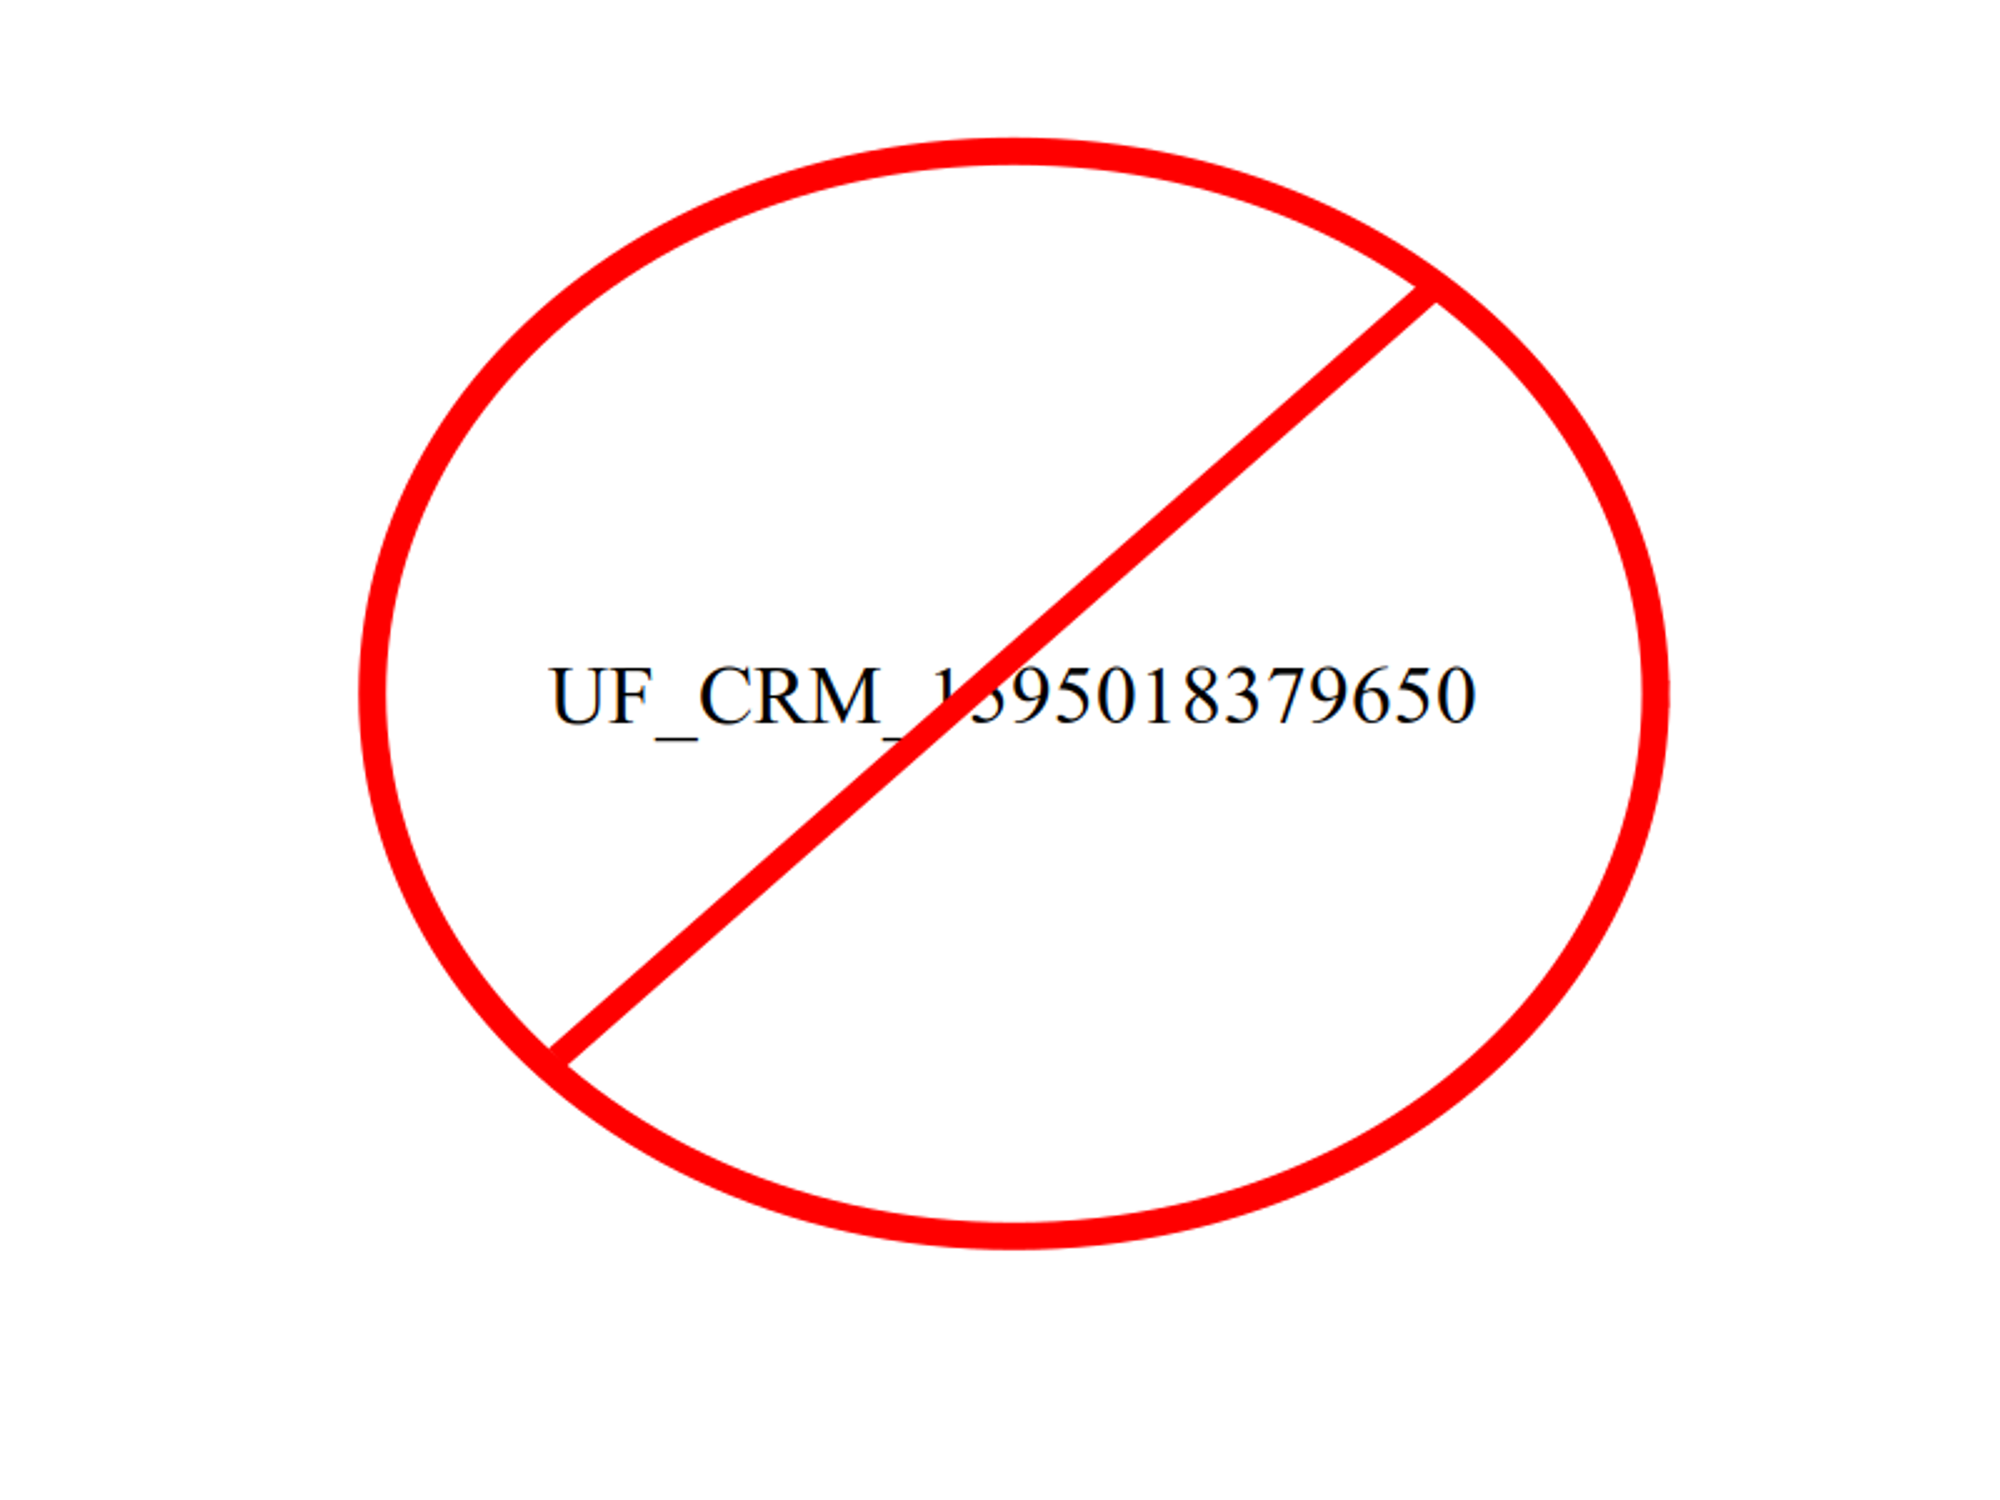
The error that may occur is: “Web form not found”
Correct the symbolic code of the form to one supported by the system. You can find out the correct code from webmasters or technical support.
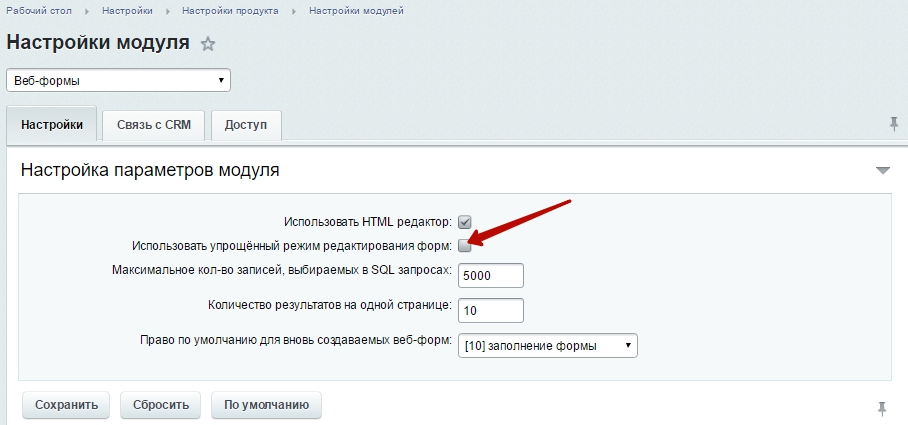
In the administrative part of the site, go to Desktop → Settings → Product settings → Module settings → Web forms. Uncheck the box "Use simplified form editing mode".
Next, go to the form settings.
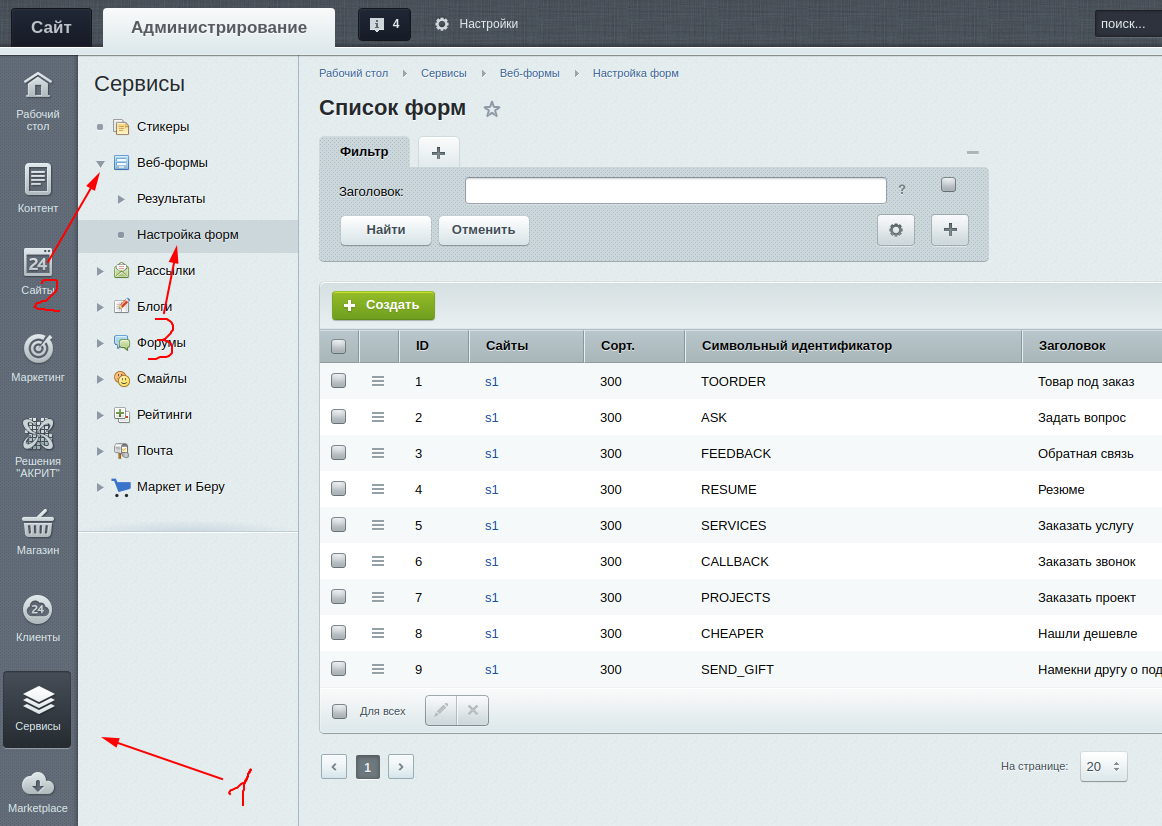
Copy the desired code supported by the system. The screenshot shows some codes for the solution:
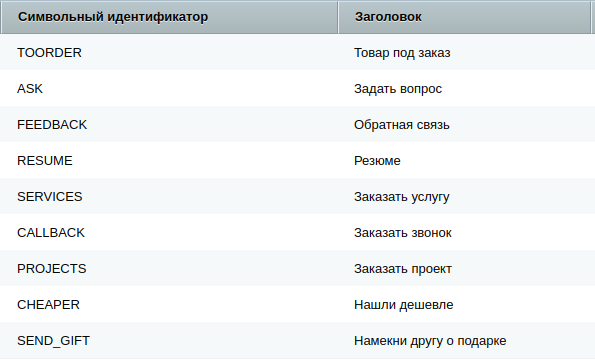
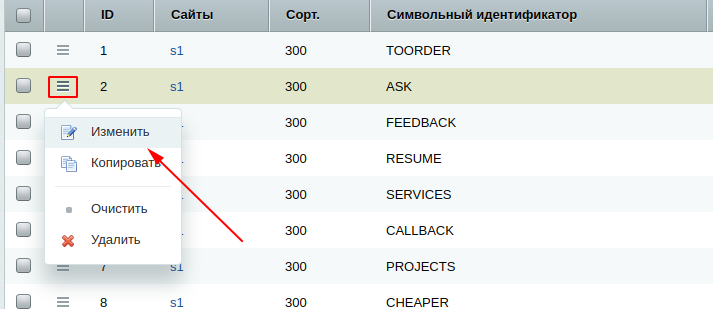
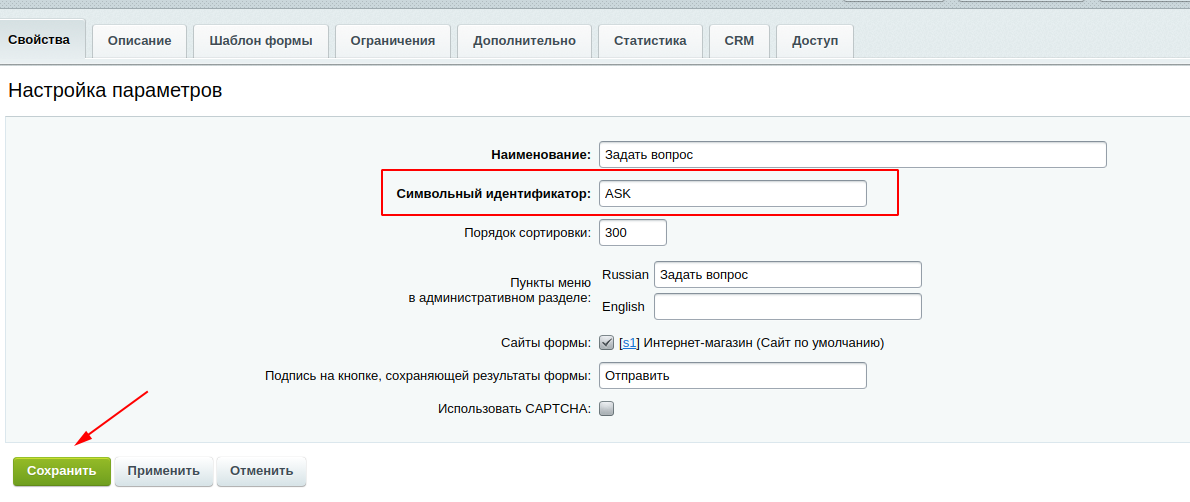
Switch to the administrative part of the site and go to Desktop → Services → Web forms → Form settings → Ask a question. On the Properties tab, in the Symbolic identifier field, enter the correct code. In this case, it is the ASK code.
Transfer of orders
Through synchronization
https://dev.1c-bitrix.ru/learning/course/index.php?COURSE_ID=42&CHAPTER_ID=04999
From Bitrix24 side
On the Bitrix24 side, the corresponding settings are in the CRM → Settings → CRM Settings → Integrations → 1C-Bitrix section. In the settings, you can change the synchronization interval and assign a default responsible person.

Troubleshooting
PROBLEM #1 We create an order in BUS and specify the "Payer Type" fields as "individual" or "legal entity", then confirm the order. On the B24 side, a new transaction is created and if this is a new client for B24, then it is created only as a company, not a contact.
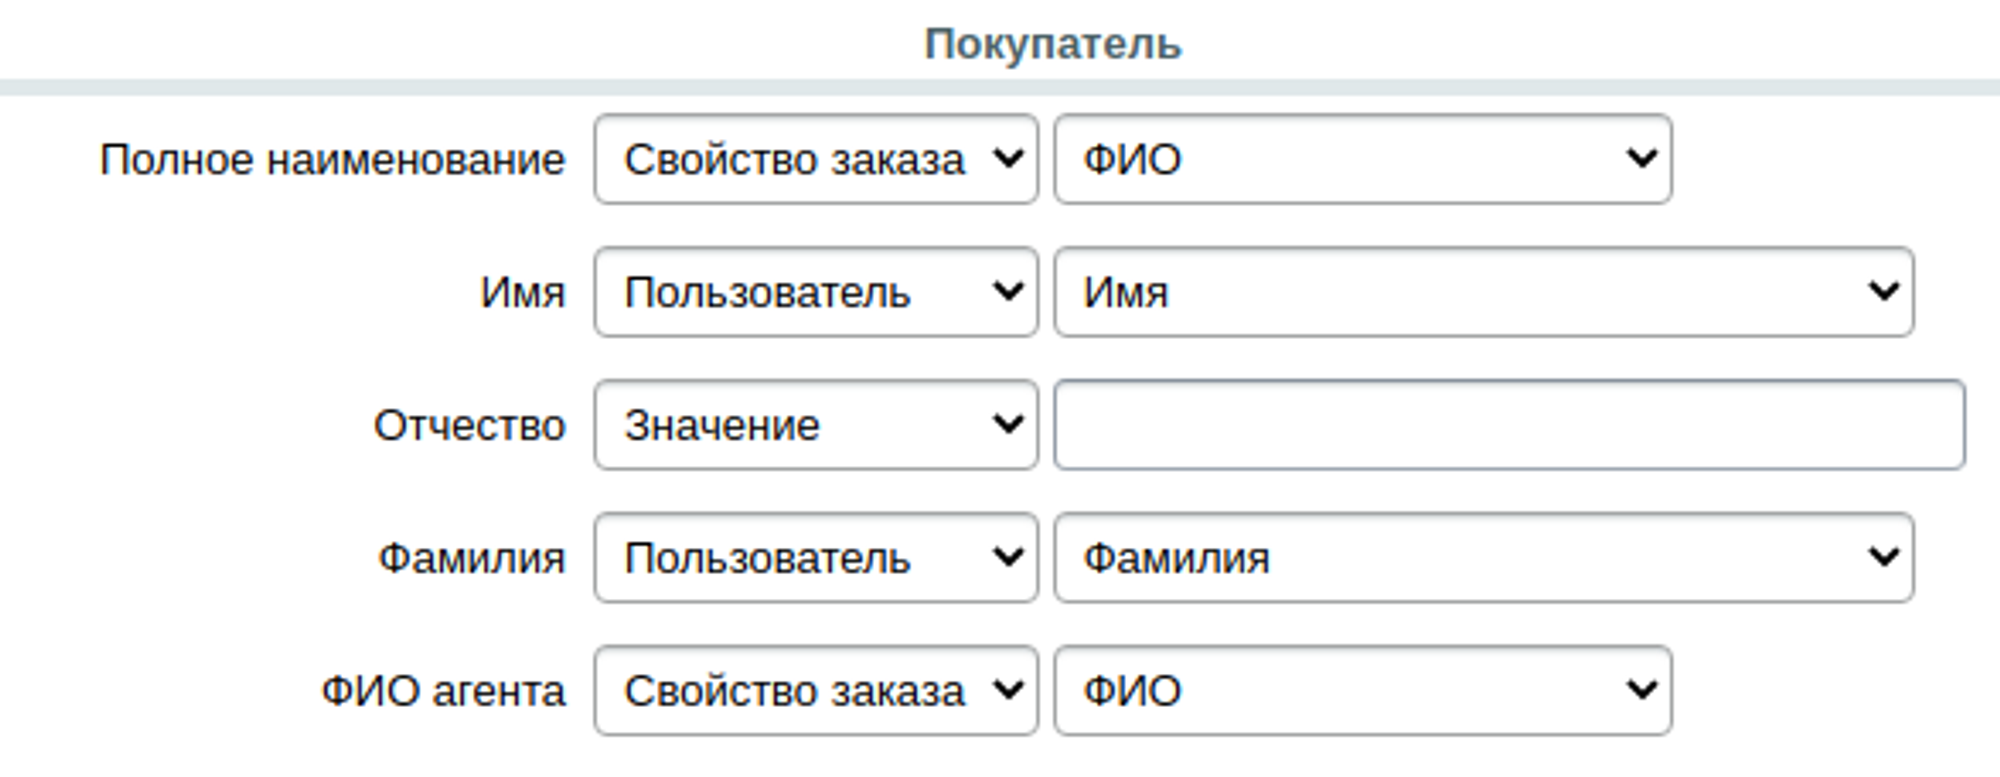
It is necessary to go to the admin panel on the BUS side and set up a correspondence for each type of payer as shown in the screenshot:

PROBLEM #2 As a result of synchronization between BUS and B24, a deal is created on the B24 side and in this deal the client's name is displayed incorrectly:
and it should be something like this:

It is necessary to set up business meanings in the BUS store settings (Store → Settings → Business meanings)
Through the app and frames
Have questions or need to find a solution to Your problem?
Leave a request by filling out the feedback form. Our expert will contact you as soon as possible


